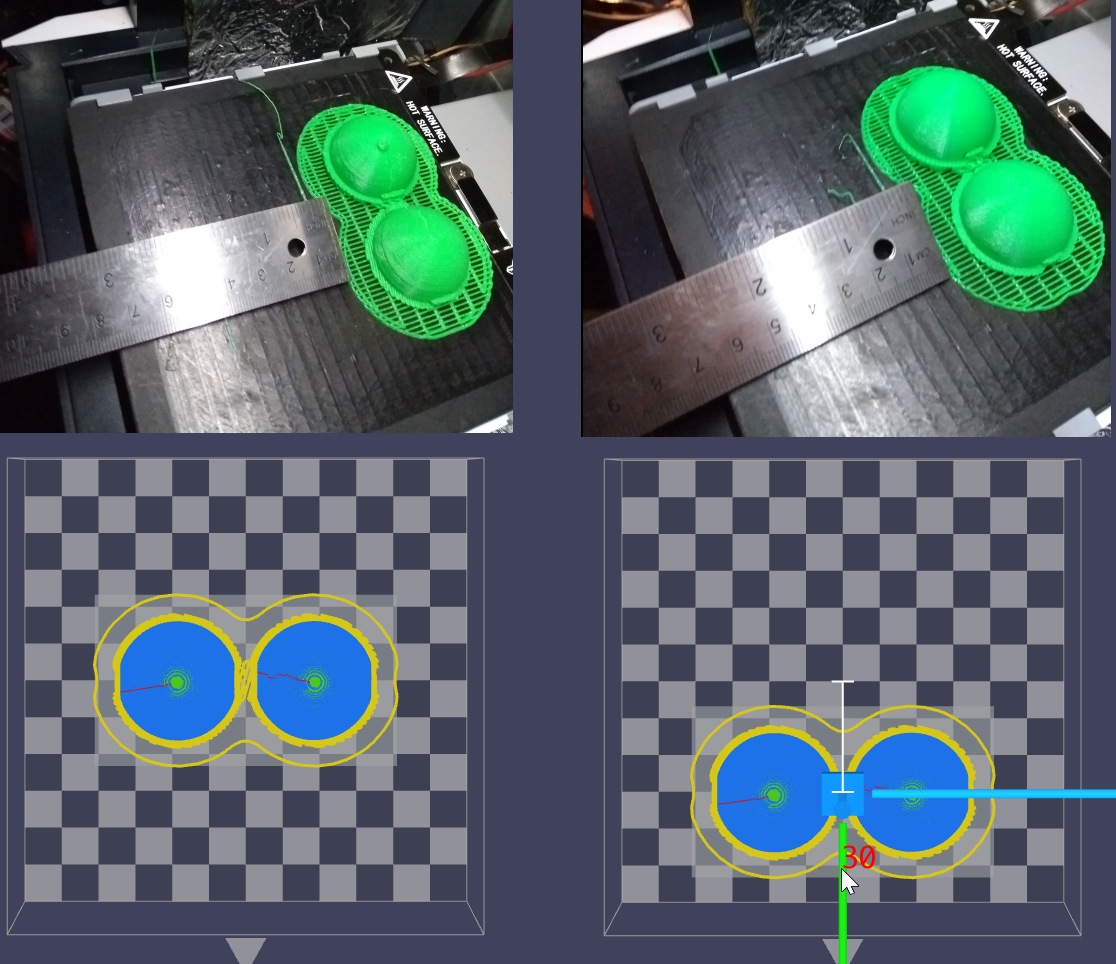
But it did move ~20mm…! And if not through Catfish, then where?
Oddly it’s similar in UpStudio, but I didn’t finish documenting that.
I think I got one larger print out through wand before I installed UpStudio 2.6. I did .zip up the 2.5 folder so I’ll try reverting as well over the weekend if I find the time.
Just import the TSK file in UP Studio, auto place it it where you want, and it should end up in that position in the build plate just as if you had sliced and printed a file through UP Studio.
I’m pretty sure Studio v2.5 can’t actually manage TSK files and either crashes it throws up errors.
Does anyone here who has used Catfish know how to print with 2 or 3 perimeter shells properly?
I know how to set it up in the settings where you change the profile count to say 3.
I’ve tried printing parts with the profile set to 2 or 3 and the min hatch profiles set to the same as the same count to the outer profile as well as just 0 leaving it to print the profiles, but what ever happens I always get big gaps between the infill and the outer most profile.
It doesn’t matter if you change the overlap values to combat this. I’m pretty sure this is a bug.
@Jason-TT can you shed some light on this? I know how to actually set up Catfish to print parts with the number of profiles I want, but I’m sure there’s an overlap bug occuring causing gaps between infill/hatch lines and the inner most profile, as well as the outer most profile when printing with 3 profiles… Can you please check this with the software team?
I’m pretty sure the result were similar as though catfish/wand. But need to repeat and document.[quote=“jimmy44033, post:185, topic:1286”]
I’m pretty sure Studio v2.5 can’t actually manage TSK files and either crashes it throws up errors
[/quote]
True story. UpStudio 2.5 threw an error with .tsk. files. I wonder if the printer broke again or it was an update with 2.6 as mentioned a bit further up, or just gremlins. Need to troubleshoot another day.
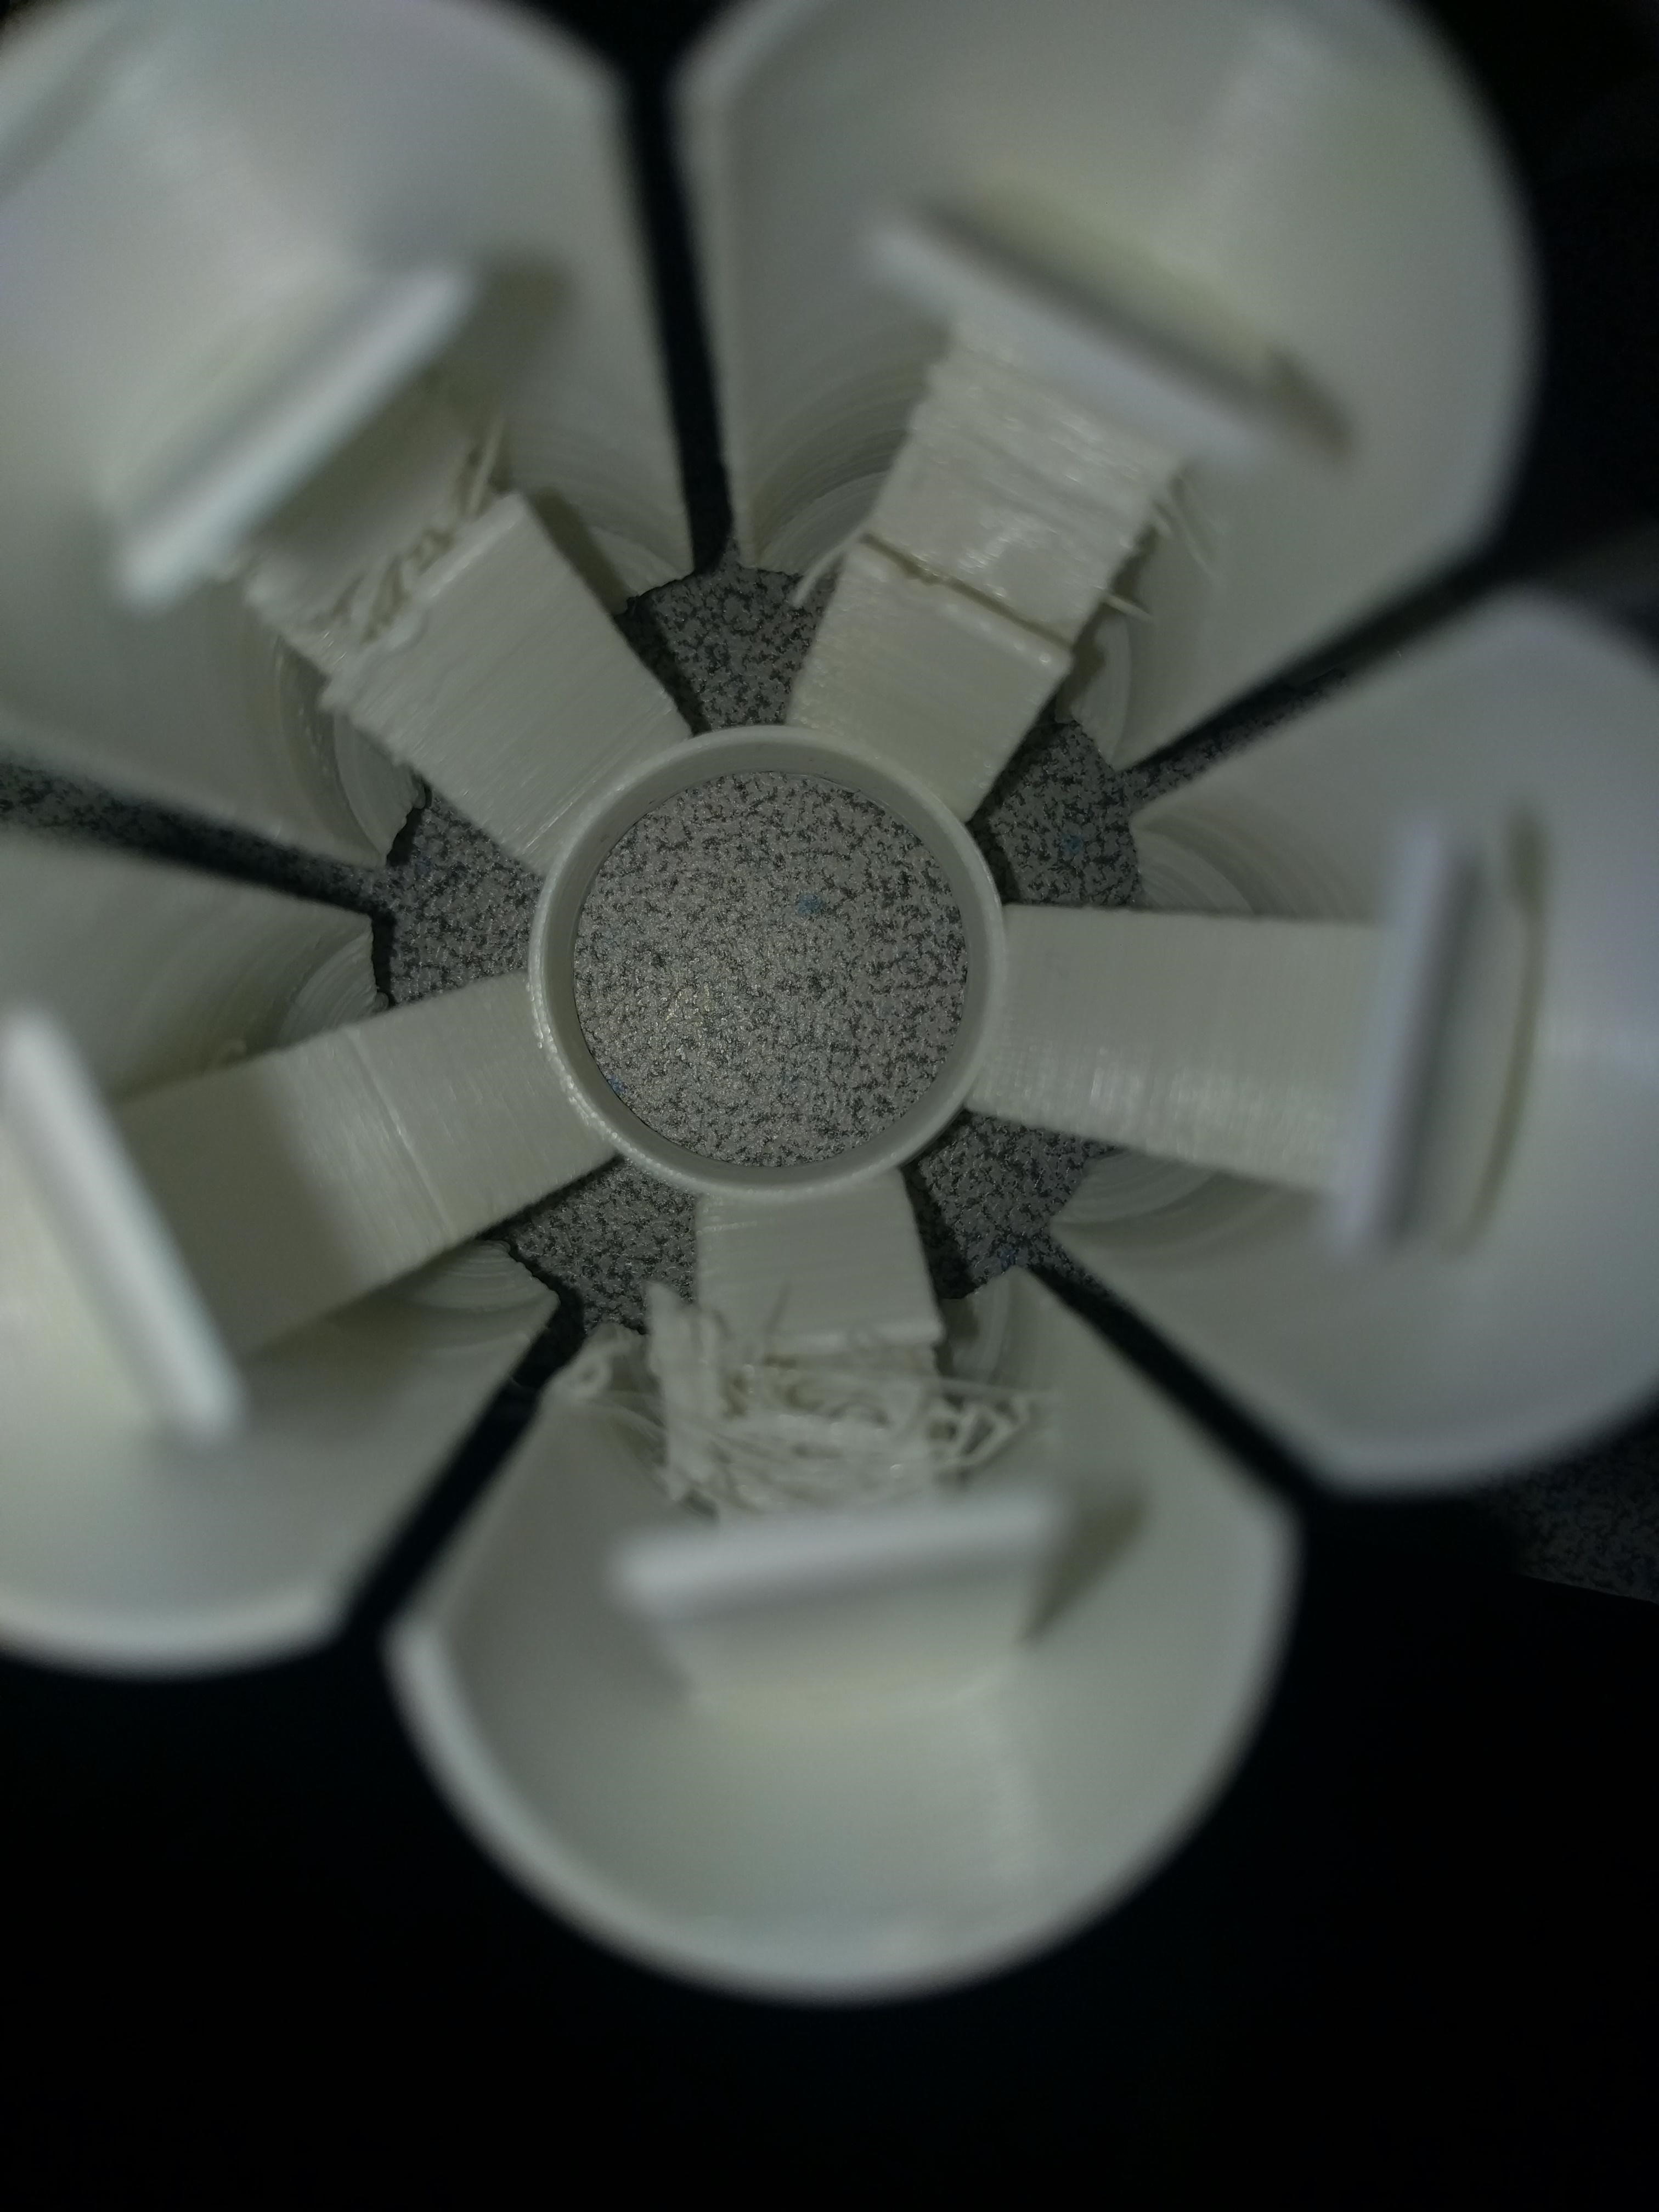
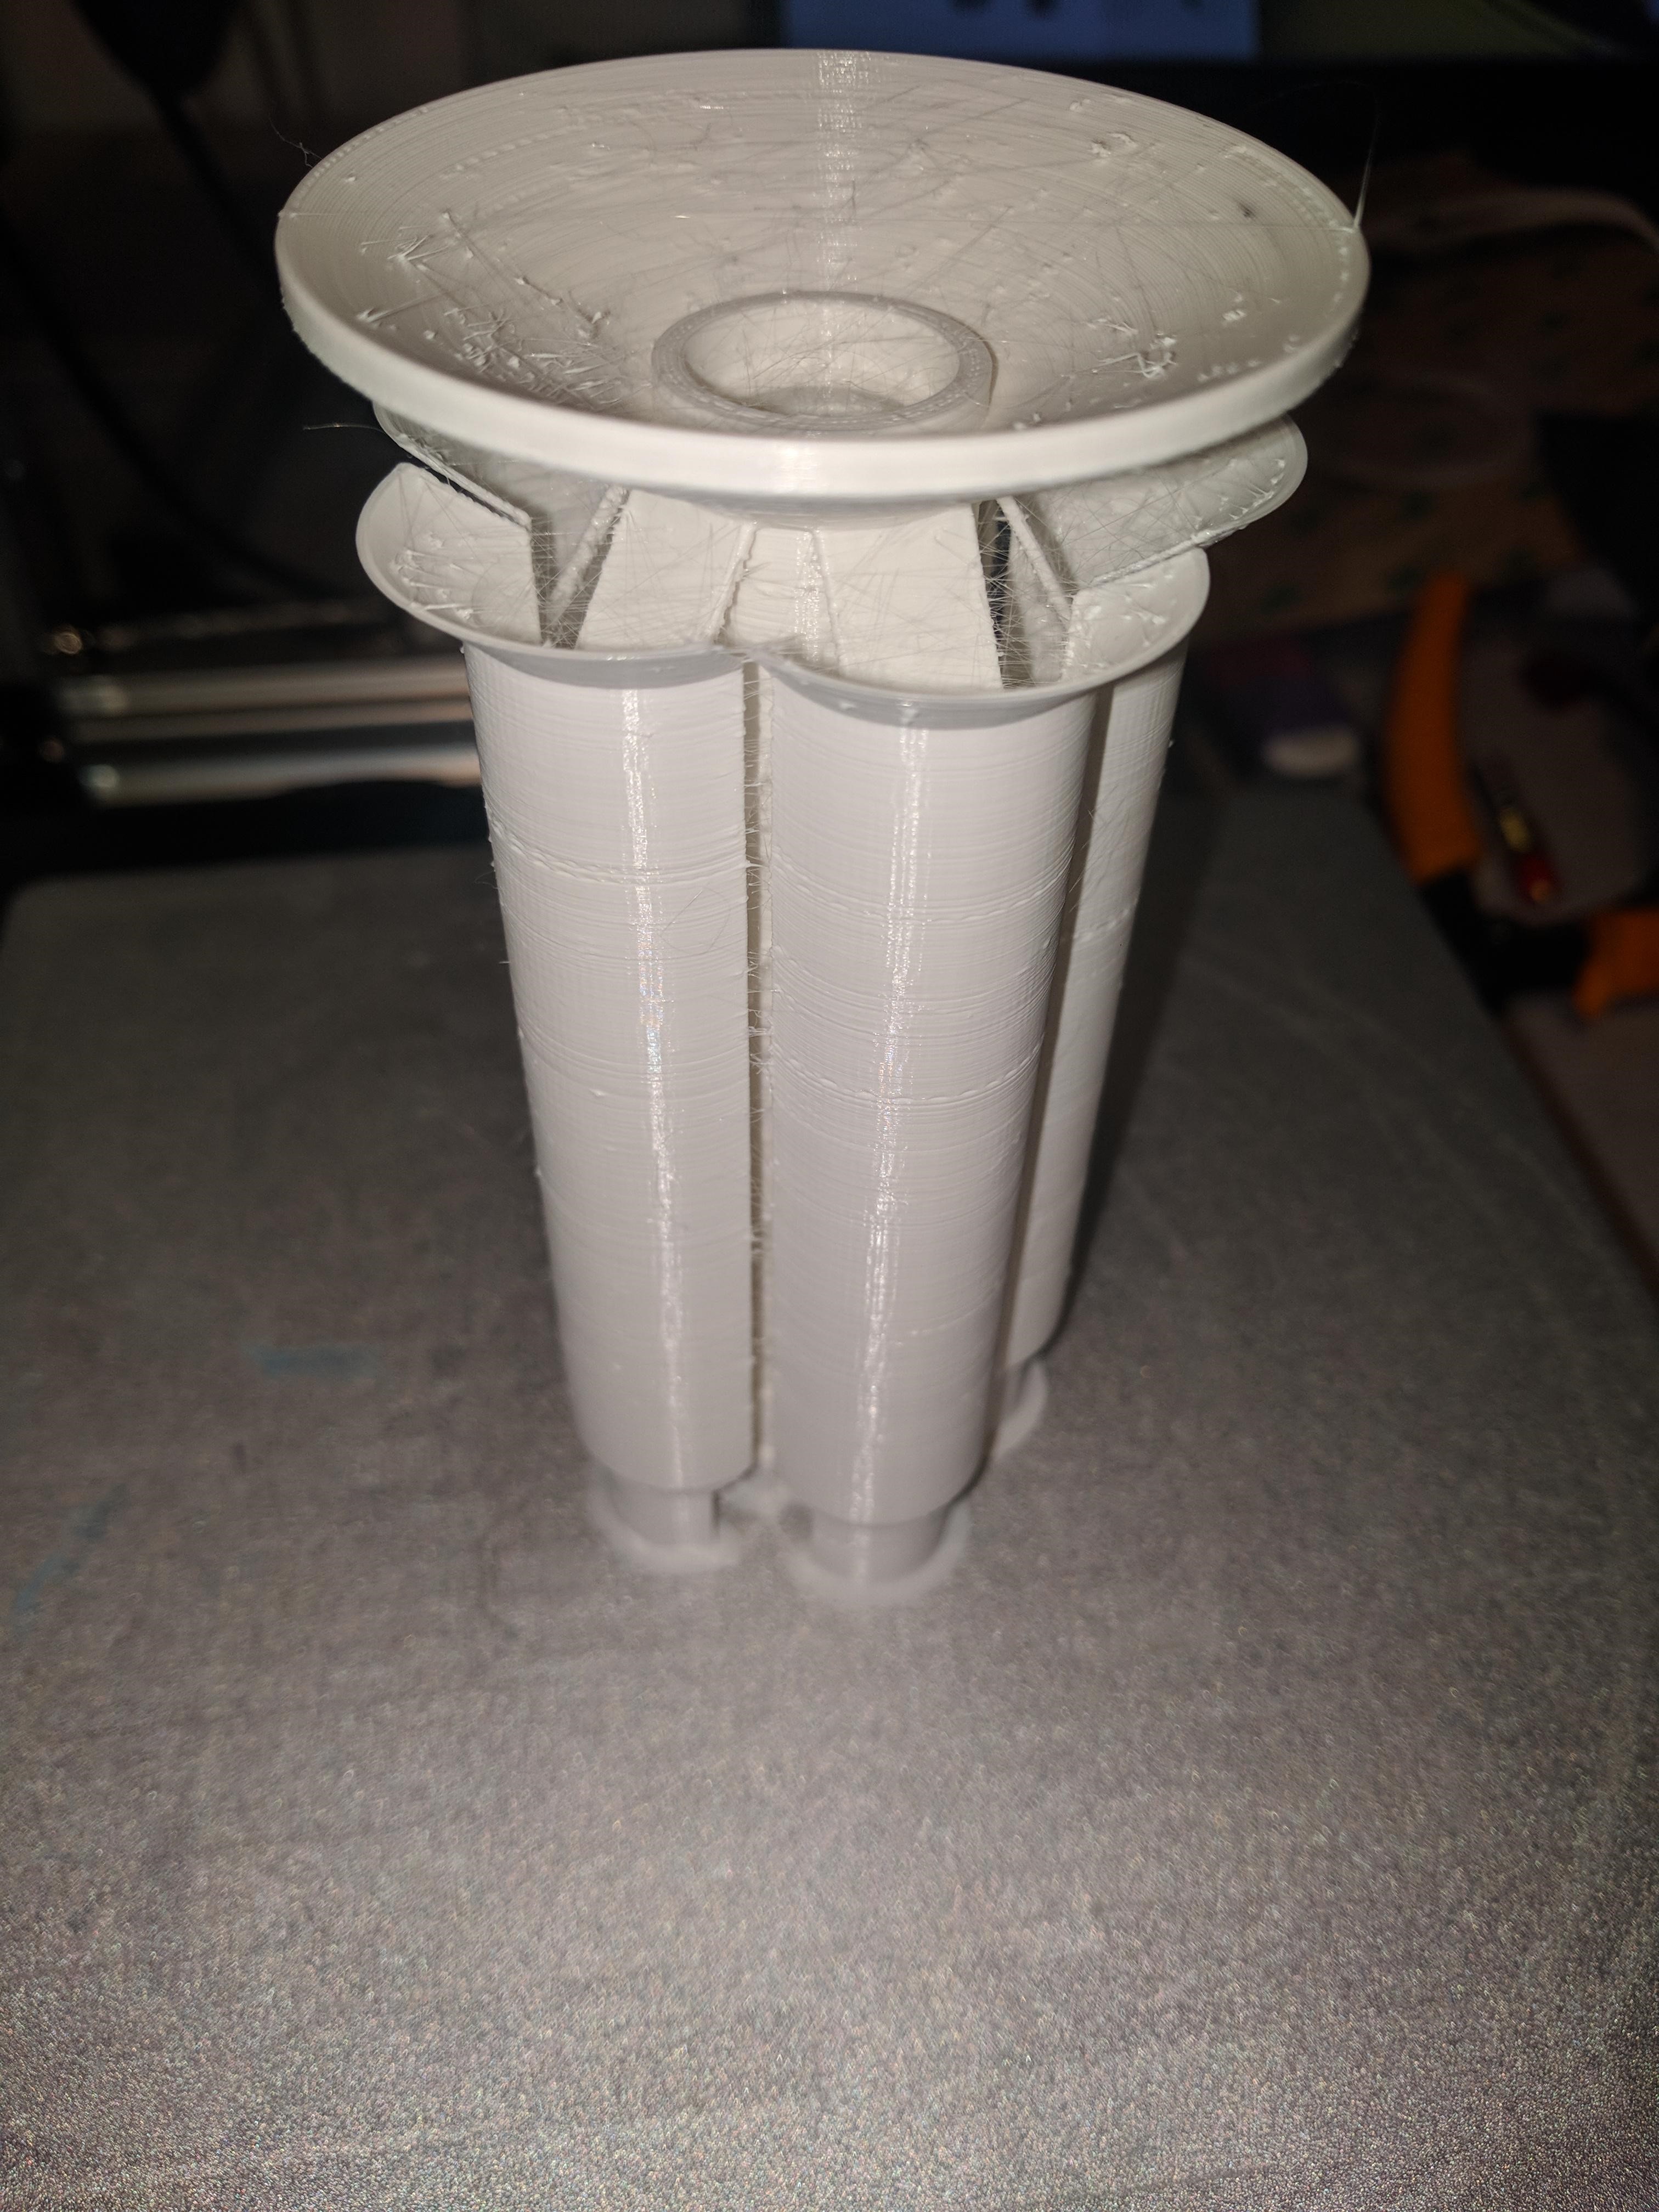
I am attempting to print a tree like structure with thin branches (actually the branches are stiff flexing springs) and it is not working out. The issue is that the nozzle eventually catches on the branches and breaks them during rapid nozzle repositioning moves to print another branch. The painful bit is the hours of printing to see if the configuration changes will prevent the branches from breaking.
I don’t see a Z hop feature or an avoid travelling over previous extruded locations in the current layer.
I have also attempted to use the start optimize center option with no success.
Am I missing some printing option or approach?
For what it is worth I calibrated the extrusion by using a printed nut and bolt test that I designed. It works some what like a micrometer. The catfish default filament diameter is rather small.
Make sure your filament diameter on any slicer you use matches that of the filament spool. So if you’re using a spool of 1.75mm ABS, set it to 1.75mm in your Catfish custom material. DO NOT use the default filament diameter of 1.7mm. This is for the stupid Tiertime filament which is 1.7mm unlike all filament produced around this size.
Filament diameter is exceptionally important with all FFF printing and must match the filament as closely as possible. It may even be best depending on the quality of your spool to measure the diameter in various spots with digital callipers or similar to get an exact reading and average that out.
Catfish lacks a lot of features other slicers have built up, so sadly no Z-hop feature is available. I can think of a few things to do… change the travel speed right down to reduce the chance of your parts being knocked off. Or if the parts are coming off the bed with the raft attached, change the ‘Expand’ value in the raft settings so that the raft extra margin is much larger to increase the surface contact. You could also try setting your nozzle as close as possible to the bed for the print to work.
If the parts are actually snapping, then there’s little that can be done. Make sure the infill is 99% or 100%, or just simply print it larger.
which printer do you have, enclosed build chamber, heated, which temperature? heated build chamber should help with warping, unless its an Up Mini that doesn’t get got enough.
No dice;
centered in UpStudio = prints almost off the edge on the far side.
pushed (30mm) to the near side in UpStudio = prints about 10mm closer to the near side.
Similar results as using Wand in other words, also makes no difference if printing .tsk file or slicing .stl file in UpStudio. When printing .tsk file with UpStudio 2.6.33.627 it does terminate the print properly, unlike with Wand which leaves the heater enabled. And reverting to 2.5 seems not doable.
I’m approaching the can’t be bothered to deal with it threshold again.I appreciate your efforts Jimmy, but with Tiertime sitting on the answers and being more concerned with “saving face” than admitting potential problems it’s not very motivating to help test their software when it breaks the hardware…
I swear the model is a practical use one for my kayak, that it happens to look “tits up” to match the printer and software is a pure coincidence:
Thanks
My printer is a Cetus mk2 extended with a V2 extruder and a few mods that I have designed and added. No heated bed or chamber.
My designs
The problem part is a new version of my expanding ball bearing spool holder. The previous simpler version can be sliced in UP studio and successfully printed by rotating the print about the Z axis to reduce nozzle to print collisions.
Both designs use stiff spring flexures rather than hinge joints. Can’t count the number of failed prints but something over half a kg. The failure happens when the nozzle catches on the springs and the result is: a layer thickness blemish, a spring surface blemish, a divot, levering up then releasing the Z axis creating an unplanned few mm Z hop, any combination of the previous with a lever breaking, and once the raft and print were knocked free from the build surface.
Looking for a path forward, I downloaded Cura and have just started climbing the learning curve. Cura or possibility printing the gcode from Up studio has some quirks. My first Z hop print is fully functional but I still need to tweak some printing parameters for a better surface finish and reducing some of the Z hop induced stringing.
Problem is the initial move in X direction is too fast so the printer is loosing steps before it gets to the print start location. (Could possibly be the reason the printer initially printed 10mm off center as well although that has been too consistent regardless of object size so doubtfull. In any case Tiertime support suggested I print a 10mm spacer and put behind the extruder to compensate, and hope died)
Guess I’ll wait for a version that allows the max speed to be set, not just the acceleration, and a version of wand that terminates the print in a safe maner. Or not. IDK.
Edit: or is config → print → speed → jump the correct setting to tweak? and if so, shouldn’t it be machine specific as well? Guess I’ll try it, one day…
Oh wow the stepper motors are deregistering on travel? I assume a simple initialise doesn’t cause problems?
You can adjust the overall travel speed. Like you said above, change the speed in print settings, jump to something like 100 mm/s.
This is not machine specific. This is a standard variable they use for all machines, or at least similar to what they use for all machines in UP Studio.
Yeah, steppers can only move or accelerate so fast with the given voltage and inductance, as such acceleration and max travel speeds is definitely a machine dependent setting; they can’t be the same across printers like UpMini and all the way to X5. Furthermore the firmware should also have these limits built in to protect the printer from misconfigured slicers (or perectly usable as Tiertime calls it )
Anyways, I tried setting the jump setting to 60 (it was the next value down where everything works basically), but either it was ignored in UpStudio or I messed up along the way (Printing from Wand is a no-go as it leaves the heater on). Guess I’ll just help push the platform to its intended position until I get the urge to bang my head against the wall again… (Edit: no, long jumps in X between layers also cause problems despite having reduced acceleration)
I’m finally getting Catfish to work like I want it to, but it’s still not quite usable for me. The only issue I’m having is with the rafts it generates. They aren’t robust like UP Studio’s and I end up seeing my parts warping along the edges. I really wanted to ditch using Simplify 3D for getting 4 perimeter prints, but it look like I can’t.
I’ll experiment with including a raft on my model. Maybe that’s the solution.
I’m frequently printing parts with Catfish hassle free.
Make sure you’re printing parts with the raft option on in Catfish, and leave the raft settings mostly on default, e.g playing with the raft number of layers will break it because of the way it pulls down bed levelling values off the SD card.
If you want better adhesion, you could play with the raft layer thickness to say 0.3mm instead of 0.25, and or play with the flow rate of the raft base but it would leave this value and just change the raft layer thickness.
If you are having problems with parts warping on top of the raft, to to the config > print and change the Bond Strength value to something greater.
If you’ve used the UP Studios’ material editor, this value represents exactly the same thing, but it’s just labelled slightly differently between the two.
Profiles/shells/perimeters don’t seem to work as well also at the moment. If you change the number of profiles from my experience it will leave gaps and not form properly around the perimeter.
What’s your experience on this?
Sigh, needed to print a “large” part on my Up Mini 2 which for some reason doesn’t want to work with the jump to warp 11 speeds wand and UpStudio 2.6 uses.
Turns out in order to install UpStudio 2.5 you need a time machine or turn off driver signing in windows 10 as the signature has expired. That is not mentioned in the compatibility chart that says to not use 2.6 for Up Mini 2… Tiertime's Next Gen Slicer - Catfish
oh, well, at least i can print parts larger than 40mm again, although a right hassle having to reinstall UpStudio to switch between large or strong part…
in short select model and press ‘P’ if i recall correctly (or press X, Y or Z and use right mouse button to drag. But moving individual models when you can only export a single model seems pointless at this time)