Some people have indicated that the new material editor in UP Studio V2.6.43 is challenging to use. I have created a quick step-by-step for those that are confused and want to be able to create material profiles themselves.
.
.
.
UP Studio V2.6.4 Material Editor:
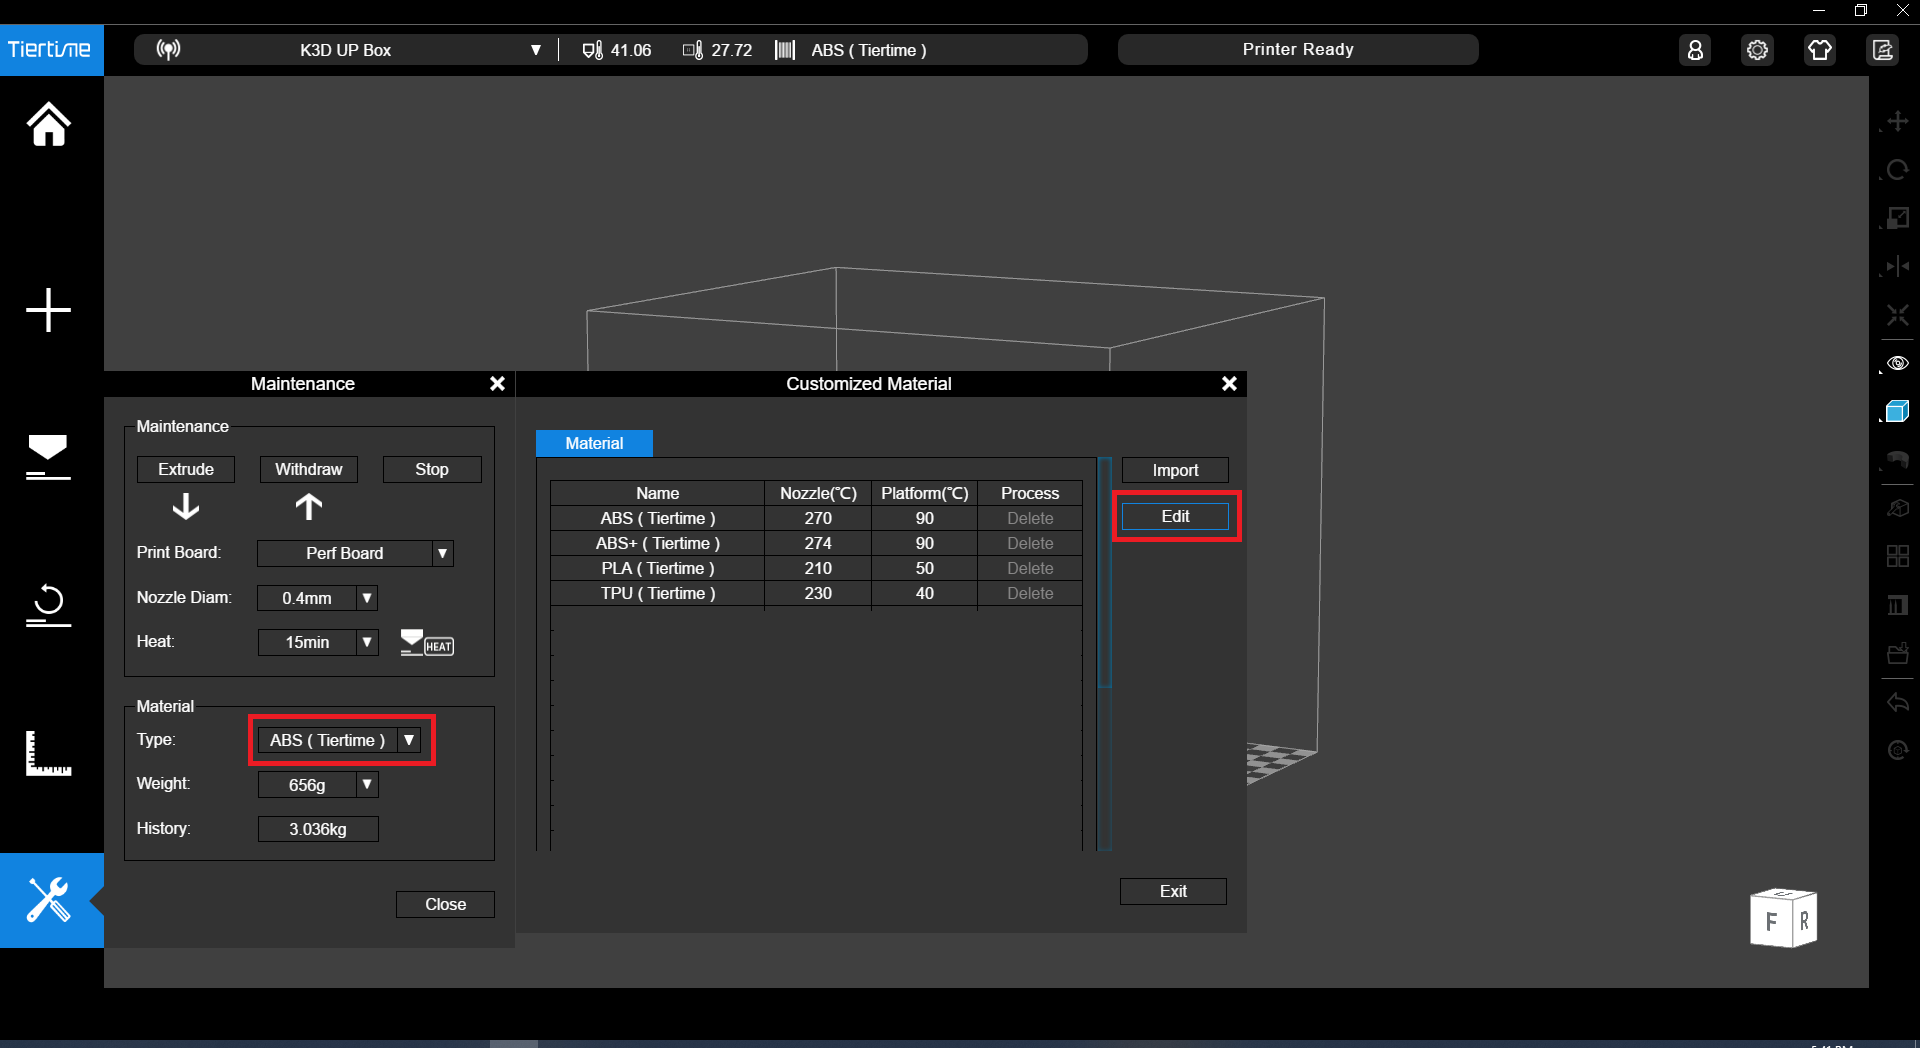
1.) Open UP Studio, make sure your printer is initialised and in the ready state. Open the Maintenance tab on the left, select the material type box, click ‘Customized’. Click the ‘Edit’ button on the right, as indicated below.
2.)
Clicking edit should bring up the new material editor interface.
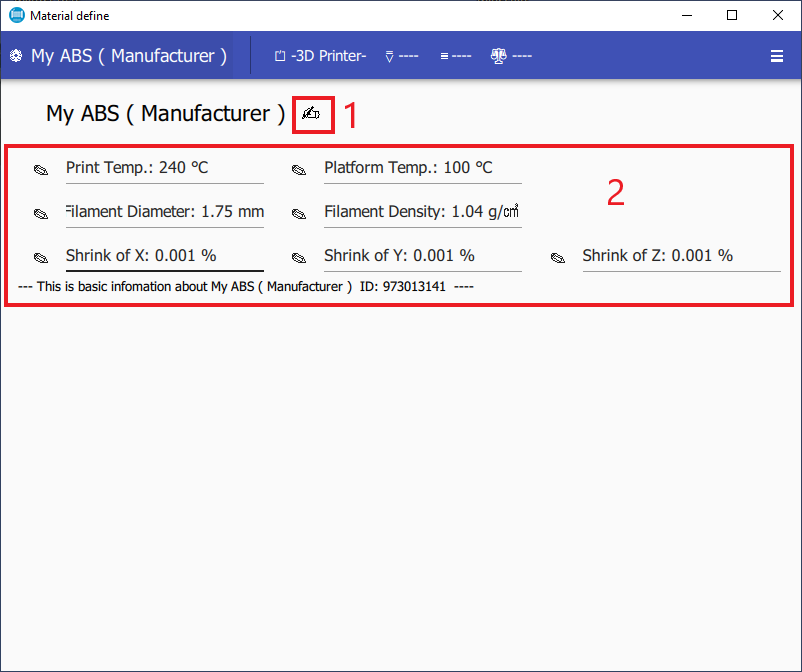
Start by selecting the active material at the top left.
3.)
Choose one of the four pre-made Tiertime materials as the foundation for your new custom material.
Depending on what 3rd party material you’ve purchased, use one of the Tiertime materials as a starting point. E.g. Matterhackers Pro ABS (ABS+) click the ‘+’ button next to the material.
4.)
This should have created a new profile based on the one you selected.
Step 1, rename your material so you can identify it in the material editor and UP Studio.
Step 2, enter your print temperature that your material extrudes at, platform temperature, filament diameter and density if you want more accurate material estimate readouts. If your material data sheet specifies shrinkage rates, you can enter these too here. If you don’t know them, leave at the default generate values.
5.)
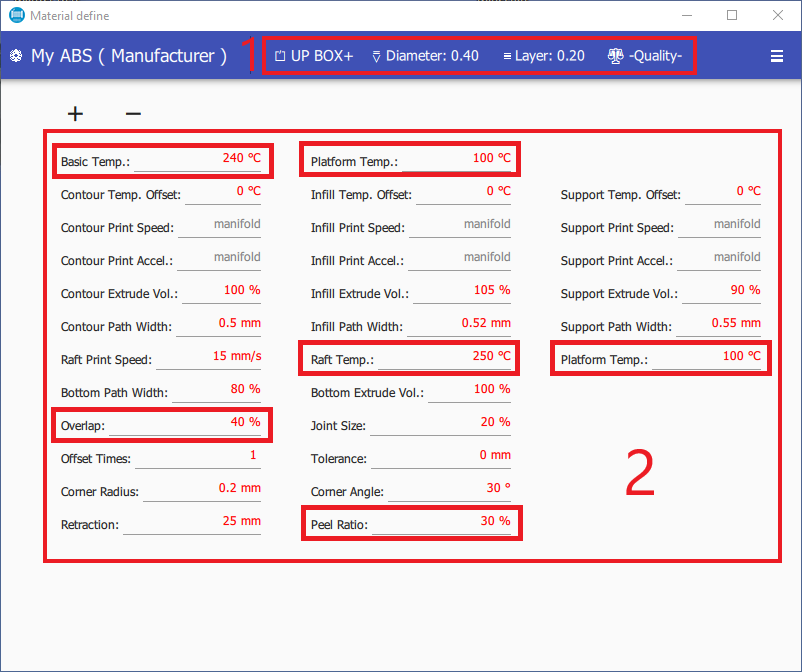
Step 1, in the box that says ‘3D Printer’ at the top, select your printer model, then the nozzle diameter, layer height, and the ‘Quality’ (speed) optionally.
Step 2, edit the values indicated in the red boxes below for your new material. Note that these will vary by material and shouldn’t be copied directly for any material.
Step 3, I recommend changing the ‘Overlap’ value to a minimum of 40%, this ensures that the infill on harder plastic materials such as ABS and PLA, overlaps correctly with the perimeter/shell closing up gaps between the two.
There are lots of setting in here. Don’t touch the ones you don’t understand.
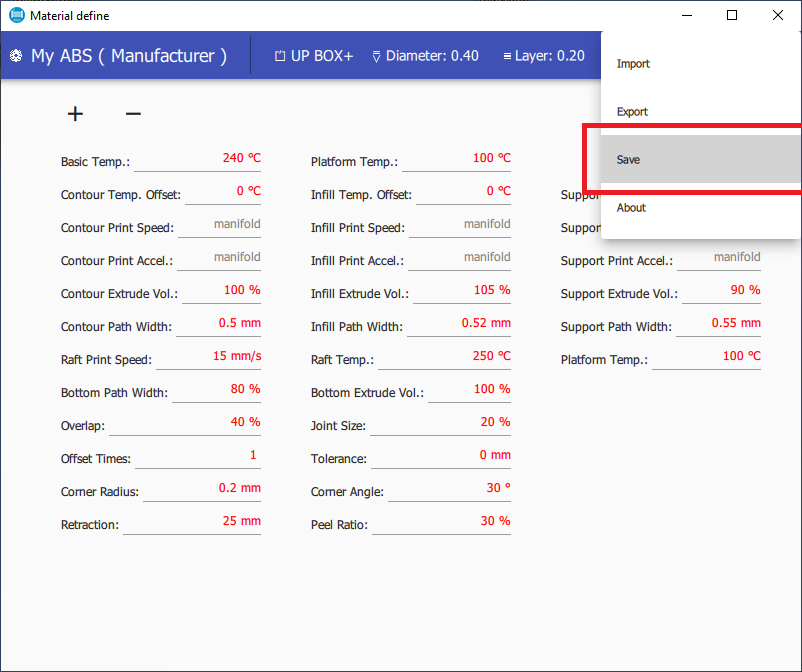
6.)
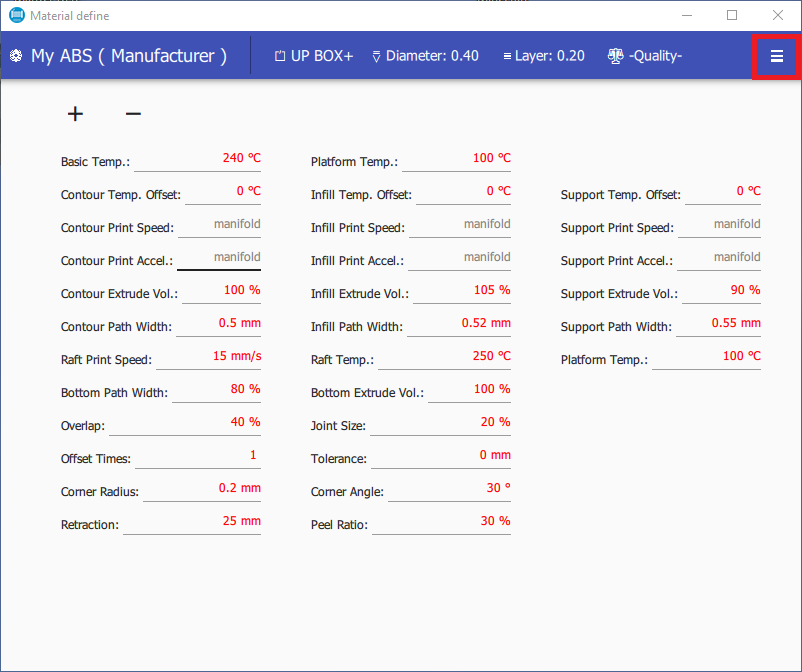
Once you’ve finished editing your material setting values for each printer model, nozzle diameter, and layer height, click up on the icon at the top right with three horizontal bars, and click ‘Save’. If you don’t do this, your changes will not be saved. You must save your changes every time you make any alteration to any material; it will not autosave.
Filament Diameter:
It is critical to set the correct filament diameter. The default 1.70mm is extremely unlikely to be what your filament diameter is. Most filament on the market is 1.75mm; it is critical to enter this value or an average diameter measured with digital callipers to ensure your extruder feeds material reliably and that your parts are as dimensionally accurate as possible.
**Peel Ratio **
Adjust ‘Peel Ratio’ value for ease of raft and support peel from the part. 0% = Effortless removal, 100% = Impossible removable
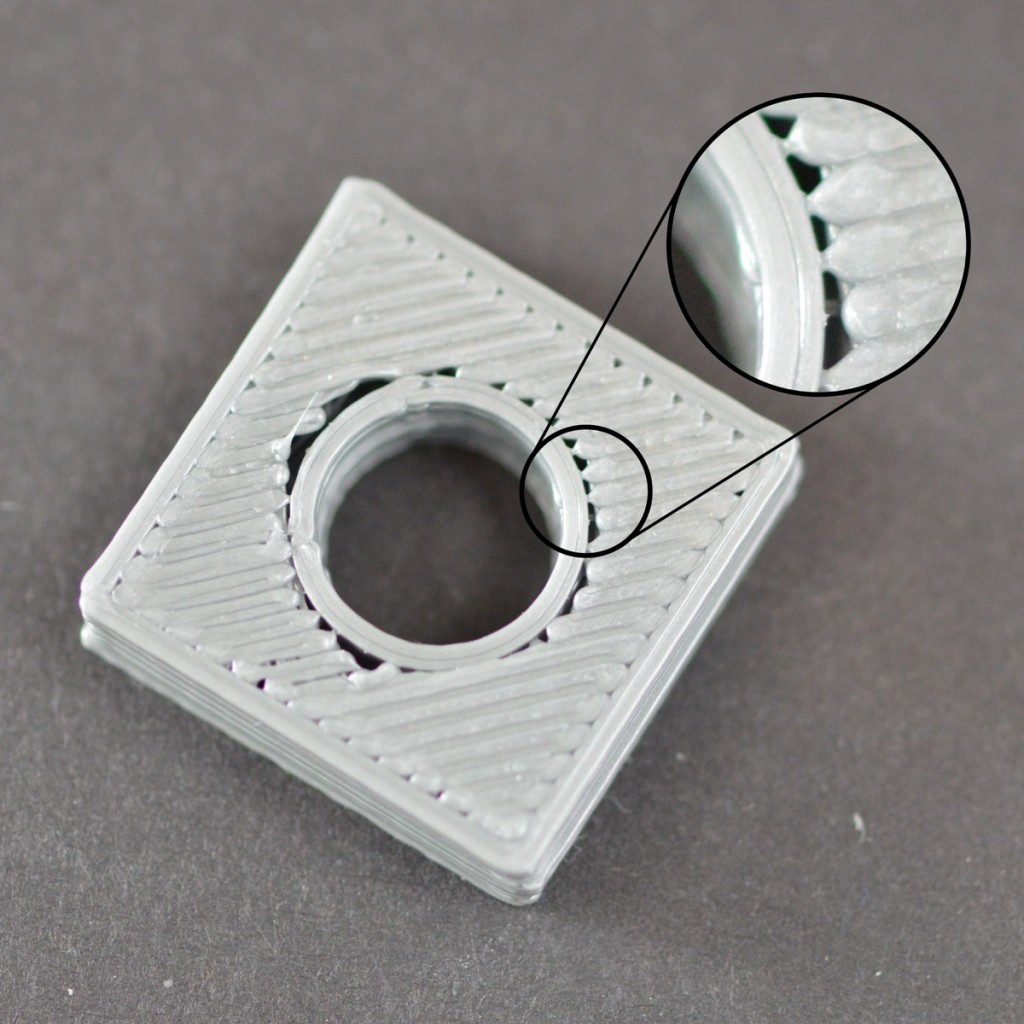
Overlap:
This changes the air gap between the top, bottom and infill layers between the perimeter shell.
If you see gaps between the perimeter shell like below, you can change the overlap percentage value to something greater. I recommend a minimum of 40% for pretty much all materials.
(Image sourced from Simplify3D)
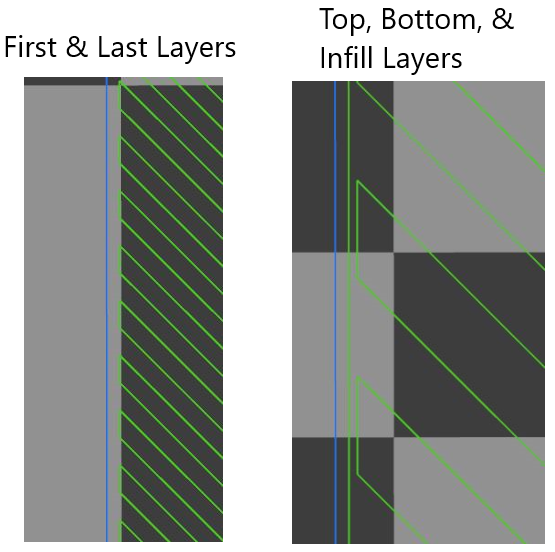
Offset Times:
Finally, we are now able to change the number of printed shells/perimeters/outlines.
By default, this value is 1. Meaning: It will print one outline for the first part layer, and one for the very last top layer. As soon as the first layer is completed, it will do two outlines from henceforth on the top and bottom layers and infill. So in effect, it already in some way is printing two outlines, but not all the time. Increasing this value effectively means there will always be at least 2 outlines.
Note that UP Studio generates infill by default with a perimeter shell alongside the primary outline.
.
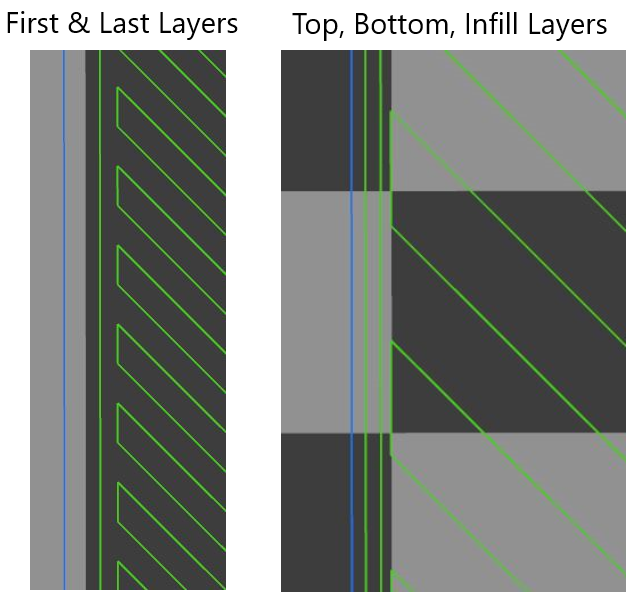
1 Outlines
2 Outlines
Retraction:
Retraction is the amount of material retracted by the extruder for every travel move to avoid oozing and stringing.
Where the value in the material editor is 25mm as per the example above, this actually corresponds to 2.5mm not 25.0mm of actual retraction length.
.
.
There are a lot of interesting settings to play fiddle within the material editor 
Thank you Tiertime for improving the material editor and the new additions to the editor.