Just got a new X5 in and I ran parts without rafts for the night. In the morning I get the parts and some of the parts have a section of the first layer smushed, which means the nozzle was too close to the platform during the first layer. The section that was smushed was the side on the rear of the machine (in the calibration screen below, it would be in positions 1,2, and 3)
I had set the nozzle height properly during setup and my first part came out nicely, but now the nozzle is too close to the platform. So I decided to run the “Auto Level” feature multiple times and collected the values of each position. I did this 30 times and took the standard deviation of each position and found that positions 1, 2, and 3 were deviating much more than the others. See my processed data below for each position:
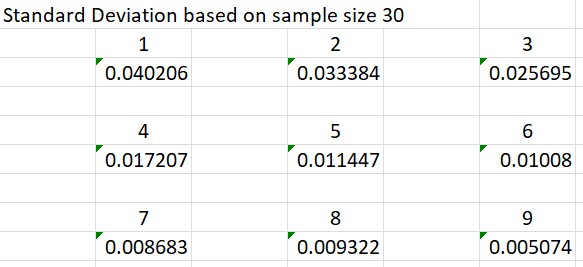
You can see how much positions 1, 2, and 3 were changing compared to position 9, which barely changed at all. And my sample size was 30 (I ran the Auto Level feature 30 times and recorded each result) which is a statistically significant sample size for calculating standard deviation.
So, my question is: why are the Auto Level positions in the rear of the build platform differing so much? It’s a problem because before each part, the X5 automatically runs the Auto Level feature and thus changes the nozzle height for every print. With that much deviation between Auto Level, many parts won’t be leveled properly. Am I able to turn off Auto Level before each part?
I’ve inspected the print head and everything looks good and couldn’t find anything that was loose or needed replacement, but I remember I ended up replacing the Y belt adapter on another X5 - see my post about it here - First part I replaced on the X5
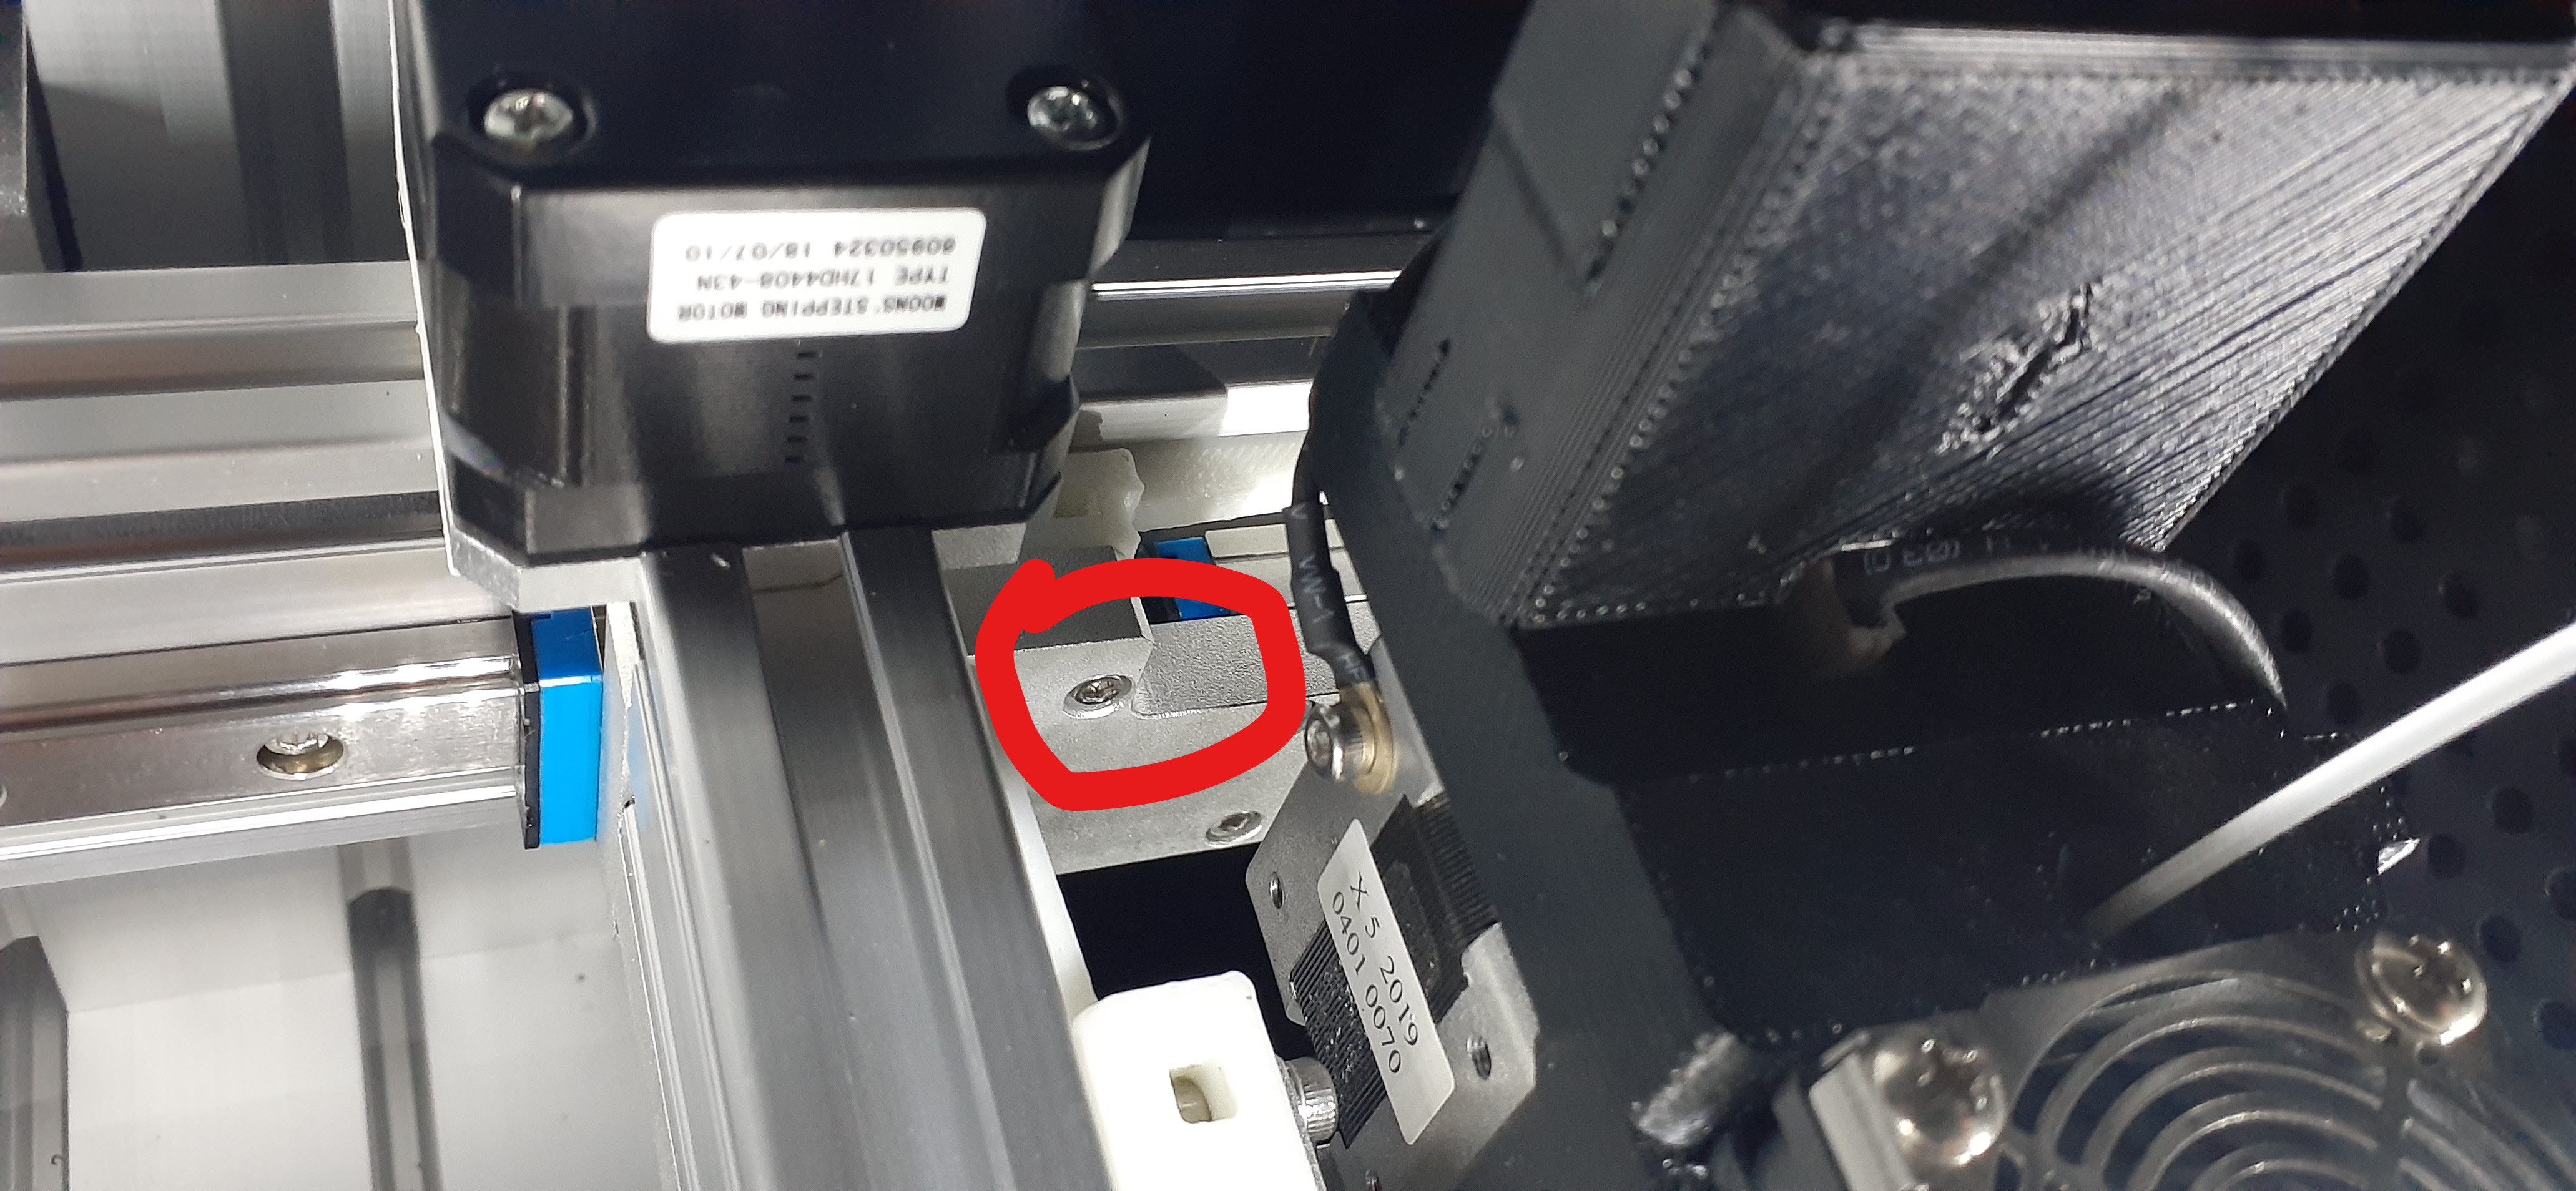
So I just simply tightened the one screw that was exposed on the Y belt adapter (see pic below and re-ran the same data collection. I didn’t run any parts or change anything except for tightening the screw about a half a turn.
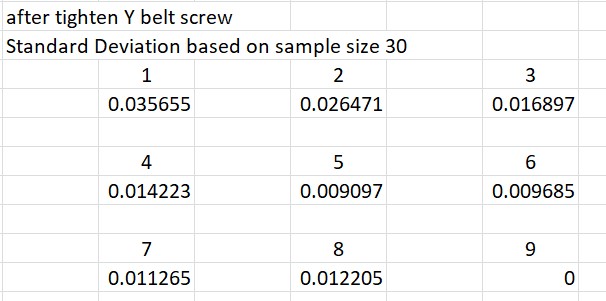
The result was definitely a big difference in variation. It seemed to eliminate the variation in position 9 and drastically reduced the variation in positions 1, 2, and 3, which were a big problem before. See standard deviation calculations below for the different positions.
To me, this shows that there may be an issue with the Y belt adapter that comes stock with the X5. The adapter is 3D printed in PLA and the screws tap directly into the plastic, which will wear over time. And, as you can see in the post I linked above, the adapter did have to eventually be replaced anyway.
Your post prompted me to check the bolts, and I found several that were very loose. I have just run an auto-levelling, and sorting those bolts out on the X and Y axis has sorted out the same issue I had as well.
I did end up replacing that Y axis belt adapter, but I had the same result. Still not sure why I have so much variation with the auto level. I checked the bolts on the auto level motor and it’s two little screws tapped into the plastic case, but they did seem tight.
My solution ended up being to turn off auto-level on the machine touch screen menu and level the 4 corners of the platform manually.
Then I had to test each platform since another source of variation was the thickness of each platform. Any platform that was too close or too high, I removed and don’t use.
Hello, what bolts did you find that were loose? I’m still having the same issue.