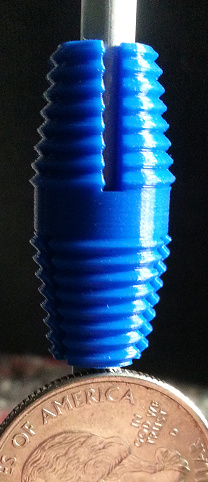
Tks for the feedback @bjorn , difficult to show the profile while keeping overall focus but also trying to display the layer lines. A shallow depth-of-field while in macro mode because of the taper, need a 3D camera to properly photograph this type of subject
Here’s the coupler printed with .20Noz at .10LHeight x .25LWidth at 40mm/sec.
no supports, no raft, no brim…just those 3 tiny pillars you see at the top of the coin.
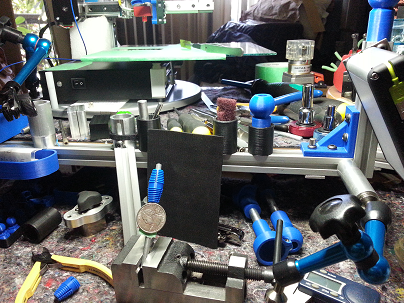
Thought it might be fun for you folks to see a portion of my CAD workstation for the Cetus3D mod project. To the right are two 24" CAD monitors, a 21" Wacom Cintiq Artist Tablet and many more tools-of-the-trade.
There is a slight teaser of my heavily modded Cetus3D MKII in the photo …enjoy
@superhans , And thank-you for the feedback Andreas. I’m also Vorfreude!
You know Andreas, I’m a little puzzled these days. A few months ago, when I was in frequent contact with a few of the support staff at Tiertime regarding the mods I was developing, I mentioned I had found a way to further stabilize the y-axis with two bolts. They could implement the method at the factory and no-one would ever notice the mod was in place. You would have to know it was there to discover it, seriously, it just blends into the existing hardware and looks like it’s just another bolt-head performing the fastening-job the others are. I offered the mod as a trade-secret and said I would sign an NDA to complete the trade-secret circle-of-knowledge…no reply to-date.
I’ve been participating in the 3D printing industry for 7+ years now, and I continue to be amazed at the continued use of precision components attached to structural components not-so-precise. I know, it’s a balancing act to compete in the marketplace… money money money makes the world turn…capitalism vs product evolution… the razor’s edge.
edit: Enjoy the new heated-bed upgrade, I can see your perma-grin in your forum-post!
@techsalad Yeah it’s really puzzling when people like you, who have a lot of experience in the field, happily contribute to a better product and it’s not even considered… And sure, it’s always a trade-off, but if a few printed pieces or other cheap parts can make a significant difference, you have to wonder…
I entered the 3D printing space since beginning of 2019 and am really amazed by the community so far. Very welcoming, lots of sharing, it’s fairly easy to contribute.
Still in the process of installing the heated bed. Although I’m puzzled by two printed parts that where included… No documentation/manual available, oh well.
@techsalad Cheers! I commented here with photos: https://support.tiertime.com/hc/en-us/articles/360023111253?page=1#comment_360002149073 The main issue is the replacement bracket, if it must be used. It has a dent that looks intentional and probably improves the structural stability of the bracket, but makes it impossible to mount it flat and not angled. Thought about designing a spacer between the bracket and the bearing block to allow for even and firm mounting. The printed parts are another puzzle, but less relevant I suppose. I thought the one with the hole might be a spacer, but it doesn’t fit for that purpose…
Thanks for the words guys, really makes a difference for me hearing them… most certainly propels me to continue despite my physical burdens. Cheers, seriously!
@techsalad No rush and cheers! Tiertime should really improve their documentation. I also contacted them directly. It’s not like one needs a 50 page manual, in most cases a few photos would suffice.
A lot will depend on the filament you use. There are some filaments that kinda fuse like SunLu. I’ve use PolySmart white filament at 195 C. 0.4 nozzle and 0.2 layer height, fine mode is ok. For more precision, you can use the 0.2 nozzle at 0.1 layer height, fine.
Thank Arnold
but with PLA i do not have any problems.
I think that it should be something like ABS or so because this part is very near the hotend.
…does anyone have an idea?
I tried to print ASA ABS and PETG .
The print always look good, but i can’t move the Wind Door.