I have more images to upload but as a new user I cant use more than 1! So as the forum allows, I will update with more images
Hello, I hope this can help some people getting start with their new Cetus2 3D and Up Studio. I will not be going over installation of the printer or software however I will be going over how to setup Up Studio so you can get printing! Please remember, I am just as new to this printer as many of you so if I miss something or there is something youd like to add please feel free to let me know and I can update this! We are all here to learn and help each other! I put this together pretty quickly, so I do have plans to add to this later. This is a rough overview of settings. Slicer options coming. If you see any typos or errors please also let me know. It was leg day today and Im tired lol
I will break this down into 4 areas. Importing the printer config, creation of a profile, creation of your material profile, changing your profile settings. You must create a material profile because some settings get locked when using Tiertimes Material profile and their material settings are not typical.
Import Config:
When you first open Up Studio you need to import the printer profile, Link
https://www.cetus3d.com/software/
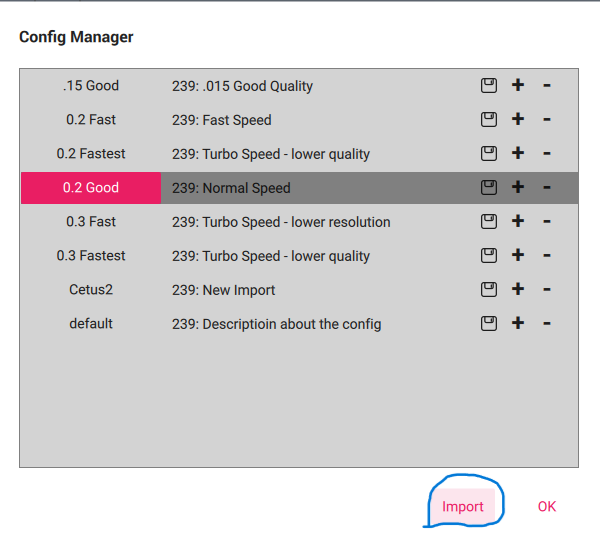
To import the file, click on the redish tab in the upper left.
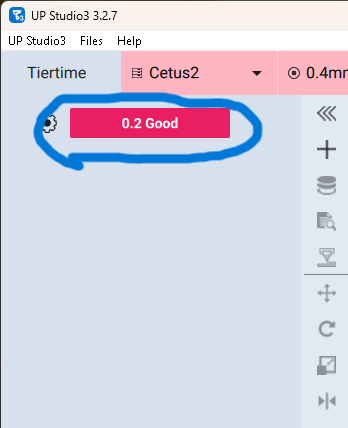
Then click “Import”.
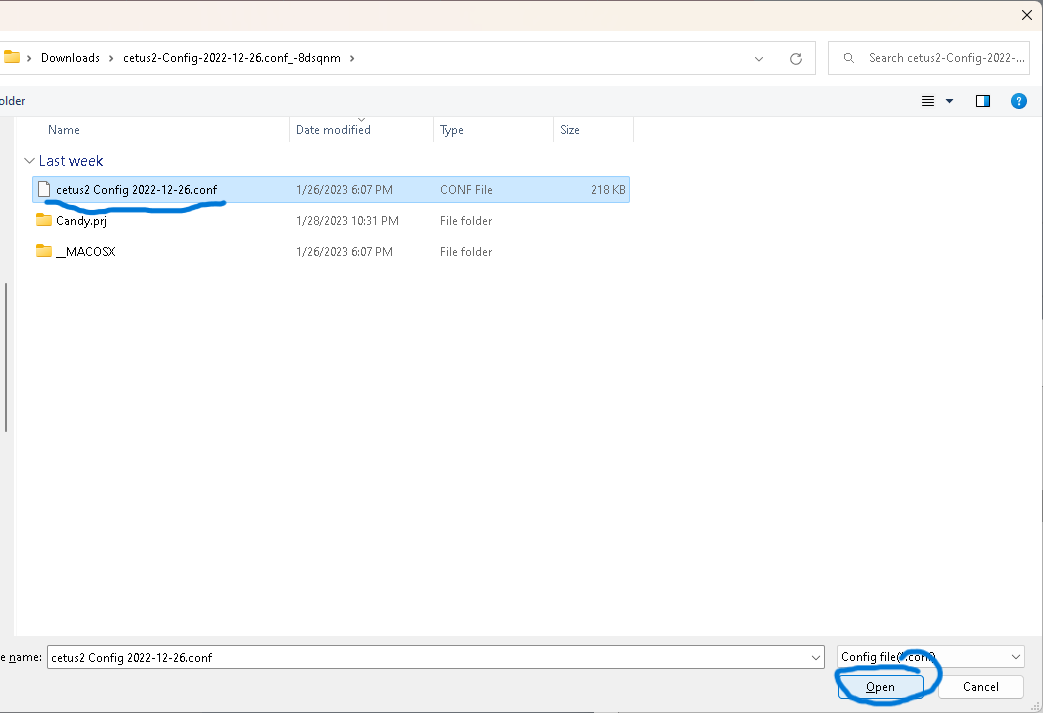
Find the file and click “Open”.
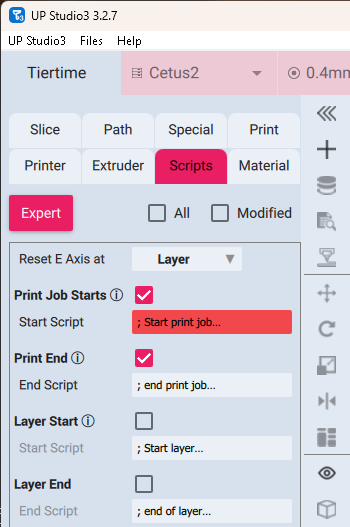
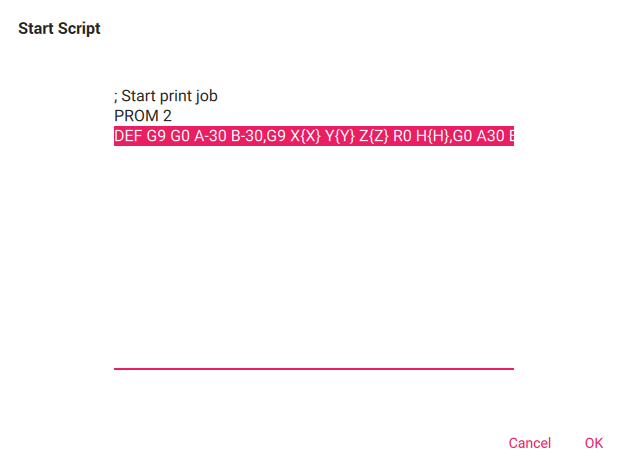
Next, open up the gear icon next to the red tab. Click on “Scripts” then the starting script. You should see this line:
DEF G9 G0 A-30 B-30,G9 X{X} Y{Y} Z{Z} R0 H{H},G0 A30 B30
If its not there try again. If it is youre good to go to the next step.
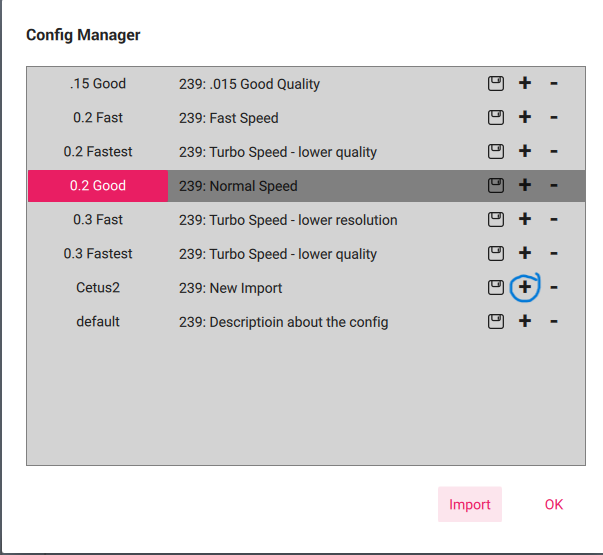
Profile:
You will want to create a 0.2mm Good quality profile. Click the red tab once again and hit the + symbol, name the profile as you wish. It will ask if you want to copy a profile, copy “Cetus2”. This will bring that line of text into your new profile. This will be a standard 0.2mm layer height nice quality profile for your prints. You can create different profiles for different settings, just be aware that for each profile you will need to setup a material profile in each settings profile as they arent global in the app. You can move on to the next step.
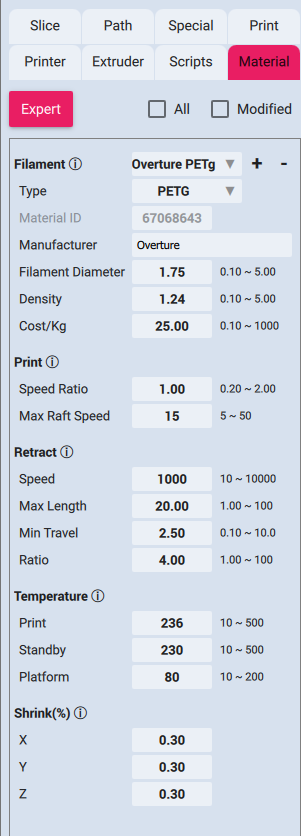
Material Profile:
In that profile, create your material profile(s). You will need to create a new material profile, atleast 1. This is to get accurate filament data, Tiertime default filament size is 1.7 and most is 1.75. You can also adjust the density, temps and retraction(currently retraction is overidden by the startup code) here. Click that gear icon next to the red tab again and click “Material”. Next click the + sign and create a new profile. Fill these out with your materials specs. Save and set those as the extruder filaments under the “Extruder” tab. Now you can change your profile settings. Using default Tiertime material settings will lock out some settings when certain settings are used. So to have full control you must create a Material Profile.
*if you haven’t yet, after clicking on the gear icon if you click the “basic” button until it reads “expert” youll unlock all of the settings.
Settings:
Here are some rough guidelines and overview of the settings from what I understand. Tab by Tab, except a couple like Material.
Slicer tab settings:
This is where you get to set the resolution of your print. The smaller the layers the greater the detail in prints at the cost of time. This is how tall your layers are. Your Path Width/Line Width is how wide your lines are. Wider lines can mean less time. Thicker walls means less movements to get the same thickness of walls. Thicker infill means less lines to meet your infill setting. Be aware that if your infill width is too much higher than your wall it could cause issues due to the pressure in the nozzle because of the amount of plastic thats being extruded for fatter infill lines. When it goes to print the thinner walls there could be too much pressure at the start. Top and bottom layers are self explanatory. There are also (i) icons for a lot of settings. Click on those and itll take you to a website for more info. This is also where you can enable supports and or a raft as well as a purge tower. However, Ive printed a couple multicolor prints and I havent used a purge tower yet.
Path tab settings:
Here you get to choose how many walls, infill and support density. The Type of infill. You can add an extra internal infill wall for extra strength. I suggest ti hange perim/infill overlap and bottom overlap to 0.3, 0.2 is default.
Special tab Settings:
I havent changed anything here from default. If youd like to change which extruder completes which portion of the print this is the place to do it.
Print tab settings:
The speed settings sometimes gets locked, which is why youll want to be sure and create your material profile. Here there are a ton of settings to play with. I change my bond strength to 15 so supports release easier. Ive changed my seam option to try and hide it better but I am still tweaking those settings. You can adjust your minimum layer time which is important for some prints.1st Layer Feed(%) is what you want to adjust if you want a different first layer height. Its a percentage based off the layer height you chose in your first tab. so 0.2 x 130% = 0.24 which what I use for PETg.
Printer tab settings:
Okay in Printer settings, the only thing I changed here was “Print Cooling”, the S value is the speed. default is max speed at 511. I have mine set to about 36%(184 value) but Im still tweaking that. Some of the hotend cooling makes its way down to the part cooling area. I wish we had more control of the fan as PETg likes no fan on layer 1 and low fan at higher layers. Here are some examples.
M42 P14 S511 - 100% fan speed
M42 P14 S383 - 75%
M42 P14 S256 - 50%
M42 P14 S184 - 36%
M42 P14 S77 - 15%
Thats it! Youre good to get started. Print some test prints and start tuning from here. Send file to your printer via wifi, USB or SD card! You can use Wand or Up Studio to send over Wifi or USB. If you have any questions feel free to ask me. I am Cyclamen on the discord.