I was excited to receive my printer today after waiting 3 weeks.
It was complaining about a memory error and after investigating, found that my unit did not come with an SD card. Is this supposed to ship with memory?
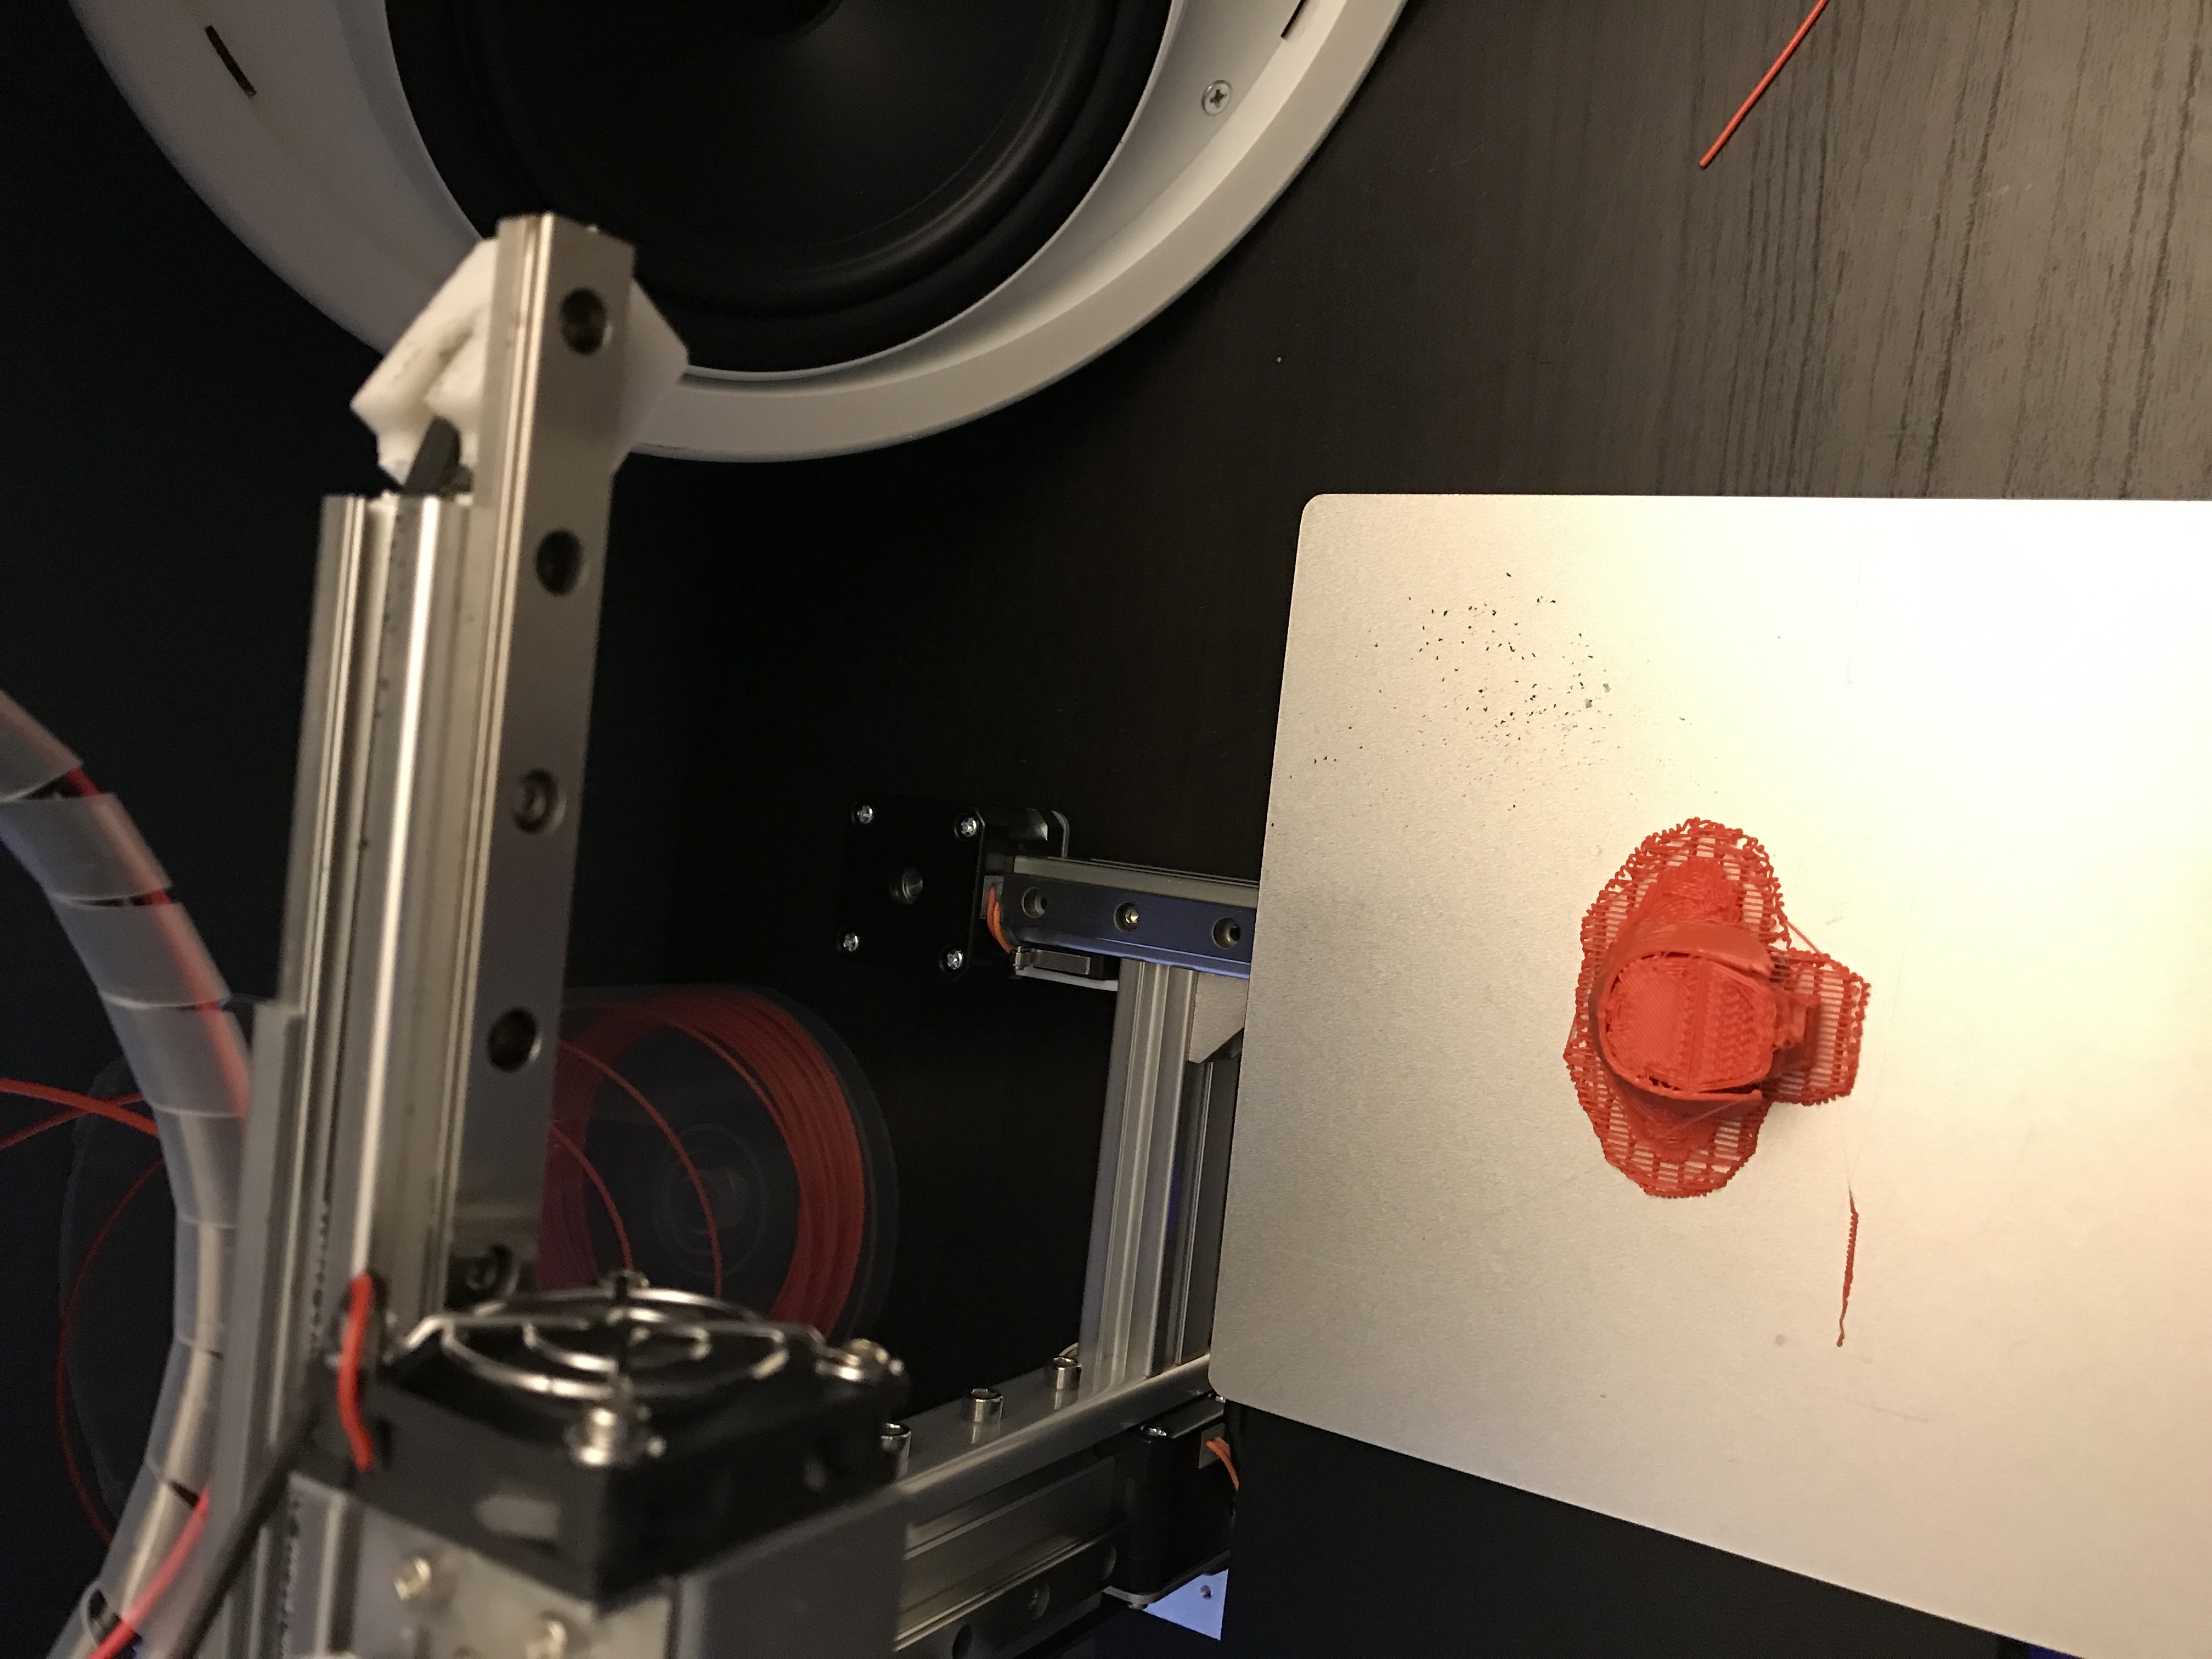
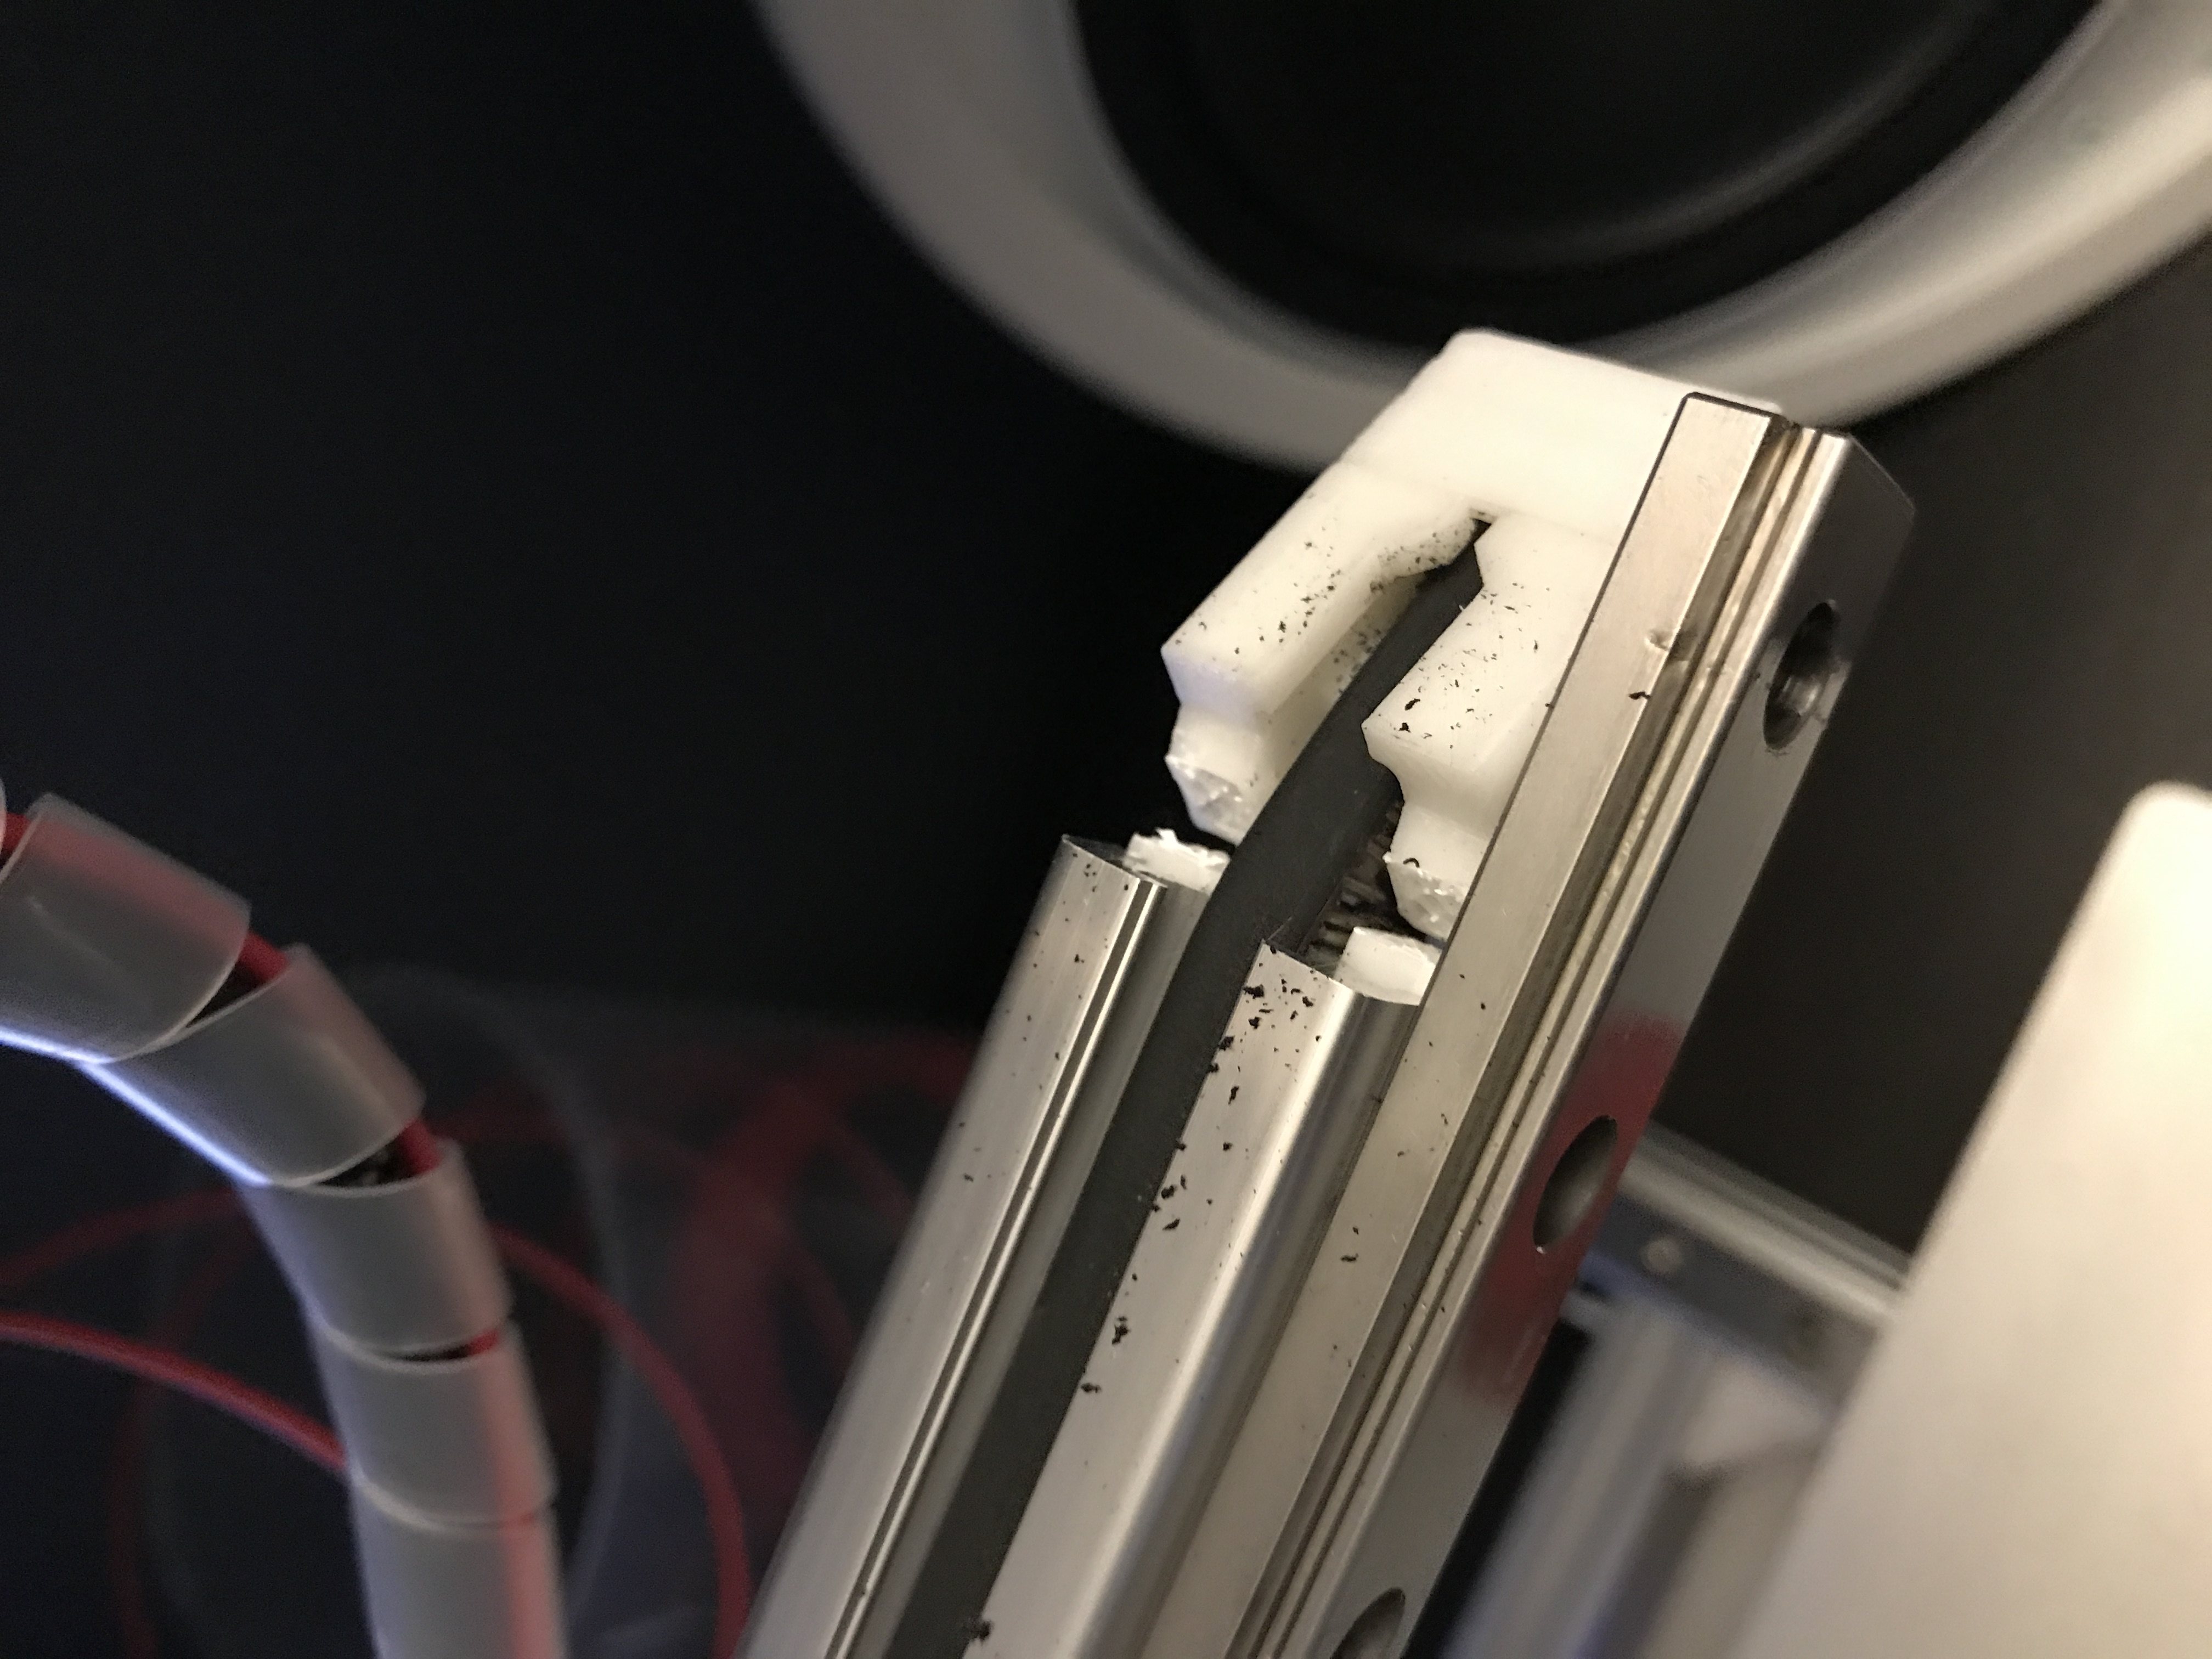
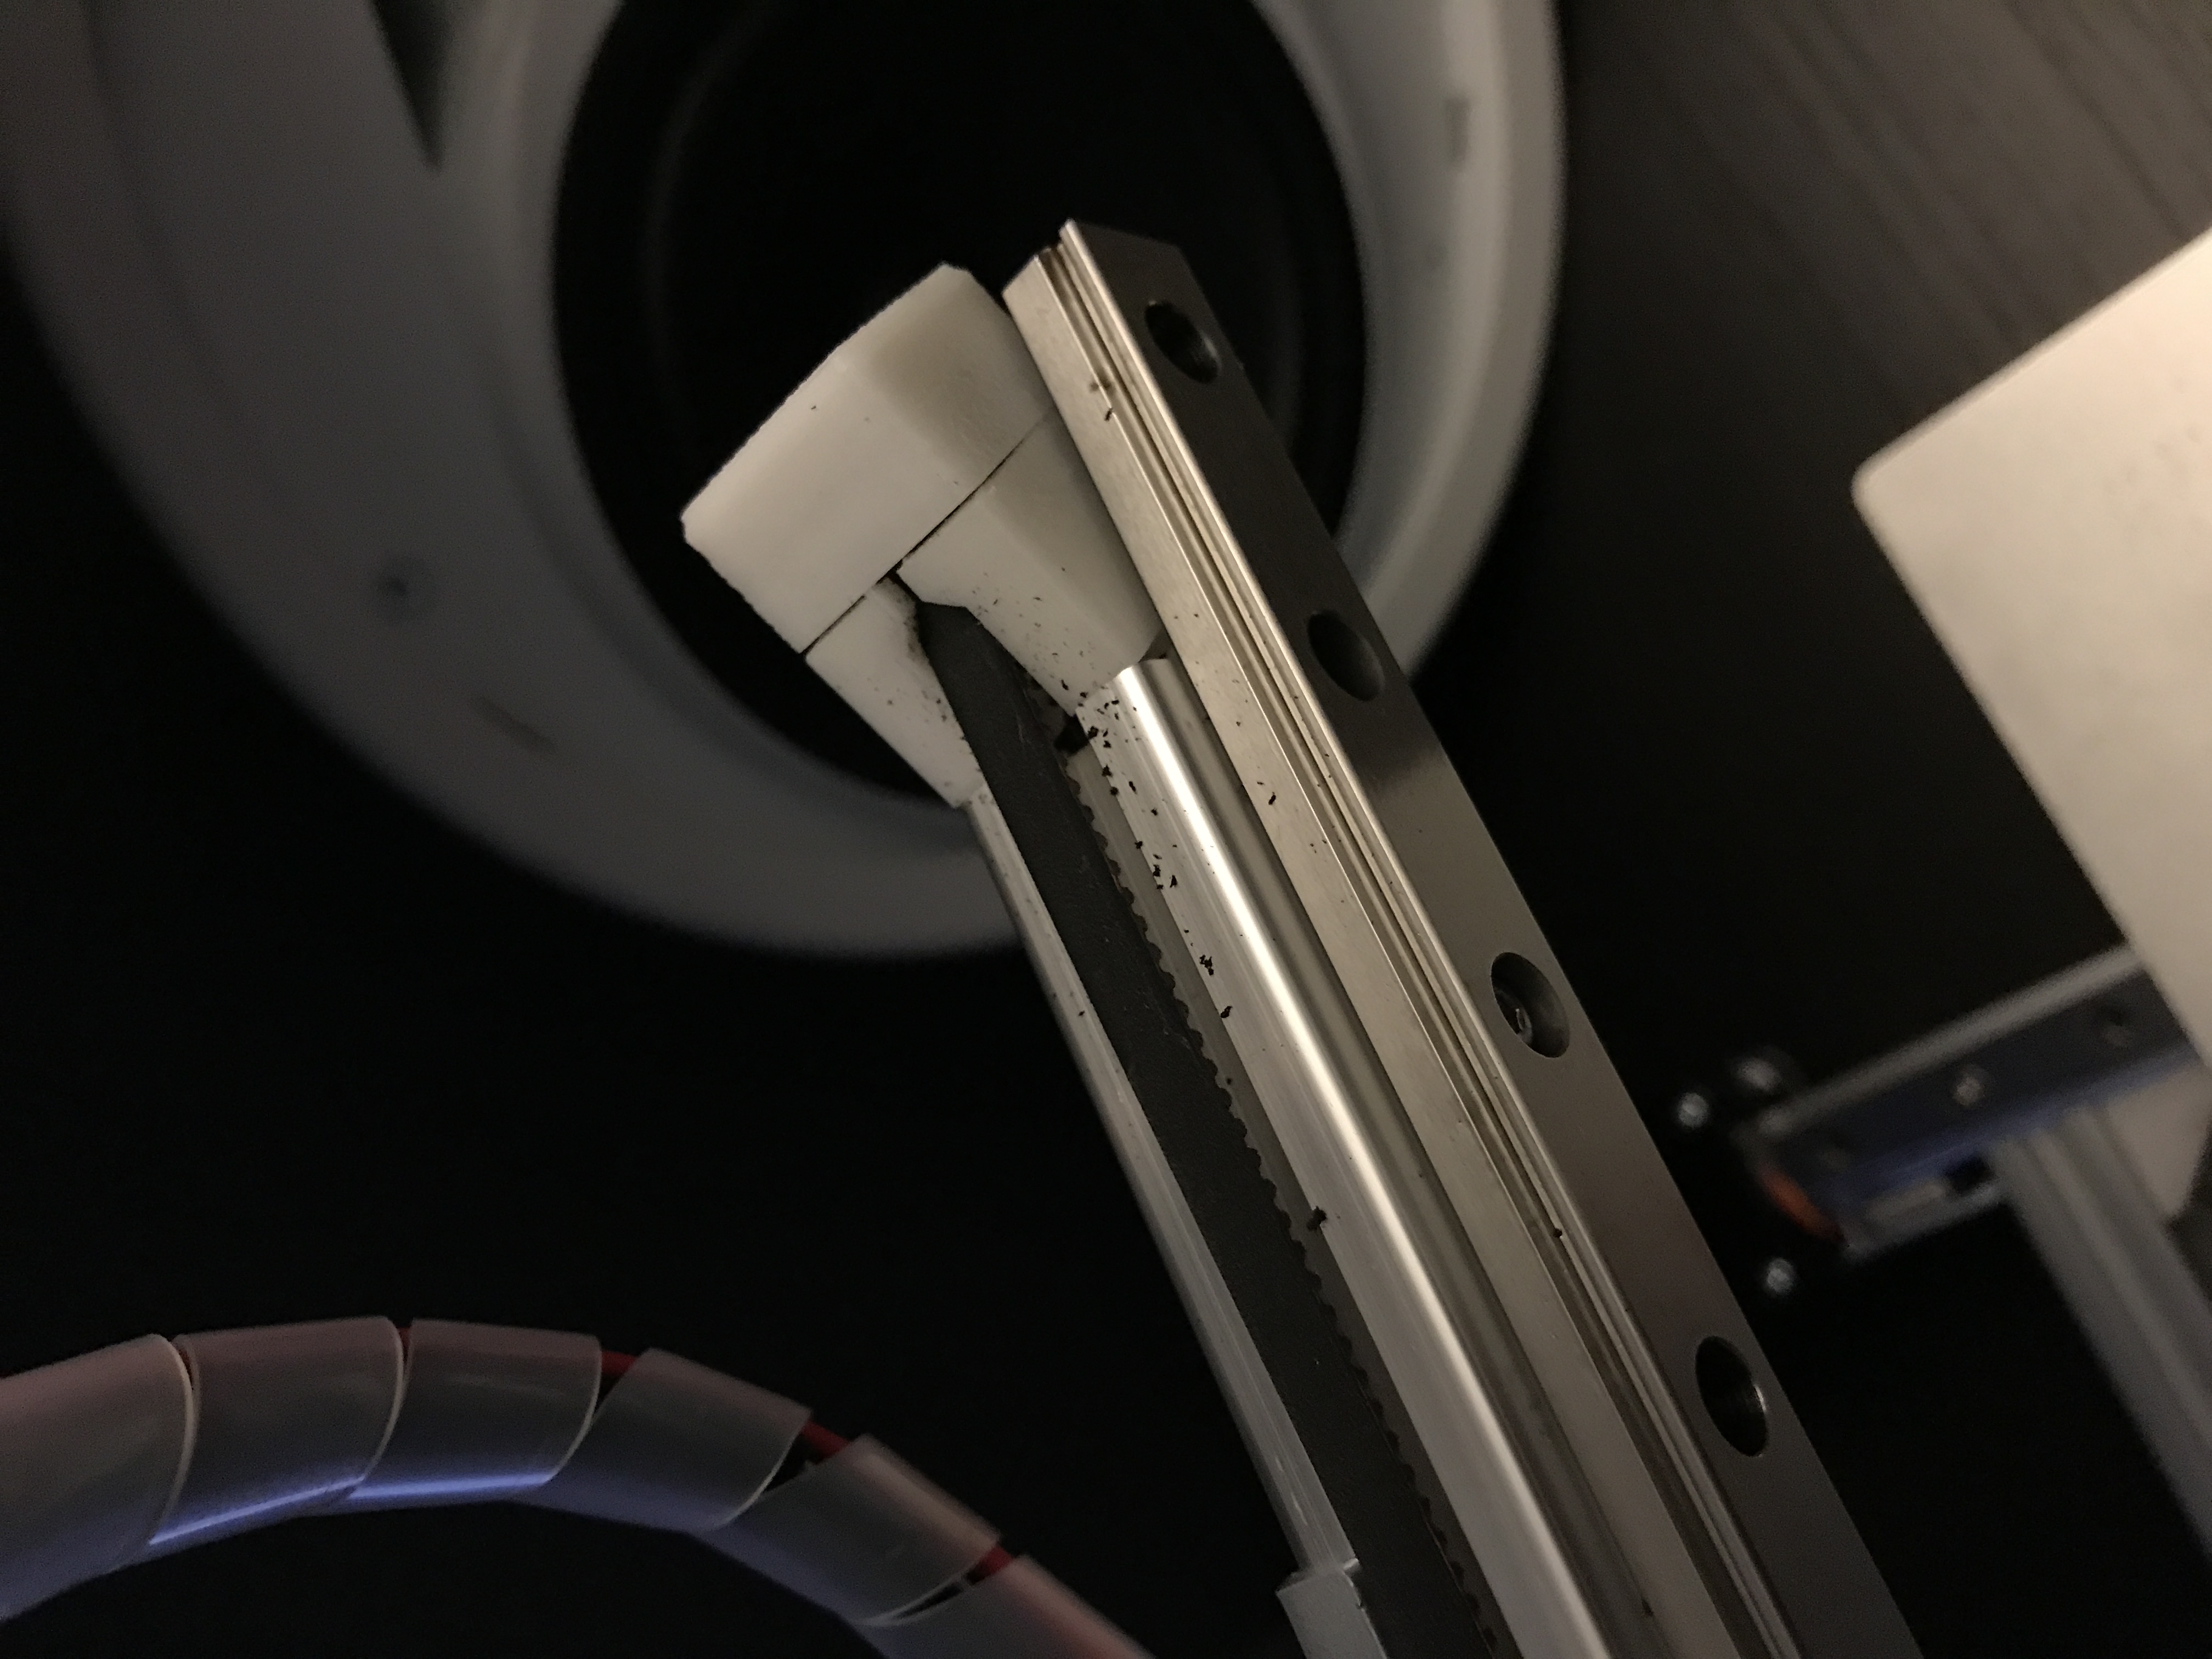
After adding my own SD card, it started printing. I noticed fine black dust collecting on the build plate. It was my belt. I didn't know my spring loaded belt holder was broken and bent, and rubbed away at the belt as it was printing.
I also noticed a small ding around the same spot as the broken holder. Manufacturing defect or shipping abuse?
Are you guys experiencing the same issues on your orders and how are you fixing them?
My printer arrived with the same borken part, I think she was borken during transportation.
Fortunatly, I have another printer. So I was able to reprint the part and to fix the printer quickly. (https://www.cetus3d.com/community/forum.php?mod=viewthread&tid=119&extra=page%3D1)
Maybe you can found somebody near you who will be able to print you this part for free, so you can quicly fix your printer. :)
[quote][size=2][color=#999999]zellkoss post at 2017-4-8 15:15[/color][/size]
Hello,My printer arrived with the same borken part, I think she was borken during transportation. Fo …[/quote]
Thanks Zellkoss. I found the zip file for the Cetus parts in this forum. Support replied and suggested to duck tape the broken piece and print a new one.
I'm just waiting to hear back on their suggested nozzle size and settings.
I had the same problem. The piece was broken upon arrival. I was able to make it work and print out a replacement part (spring-loaded pulley holder) that has been working well.
Fun fact: a 1" binder clip fits the arm pretty well. If you use one, along with a rubber band or something to hold it tight against the railing, you should be able to get pretty solid print quality.
I only secured it with a clip and had some issues with the layers being just a little bit out of alignment, (you can see that in the 3rd photo) but with a bit of effort I was able to get the replacement on and get it back up and running without another printer available.
I ended up doing something similar with tape and a rubber band. The part I printed ended up too big so I had to sand the side guides down and cut the middle section. All good now.


